Friday 28 July 2017

Pepper Spray UK

When it comes to self-defence, the laws in the UK are very strict and rightly so. This can cause a problem for the general law abiding public, how can you effectively defend yourself from an attacker but still stay on the right side of the law. Mace is not legal in the UK, but there is a pepper spray UK equivalent which might just do the job and help buy you precious seconds to enact your escape, it's the perfect self defence spray.

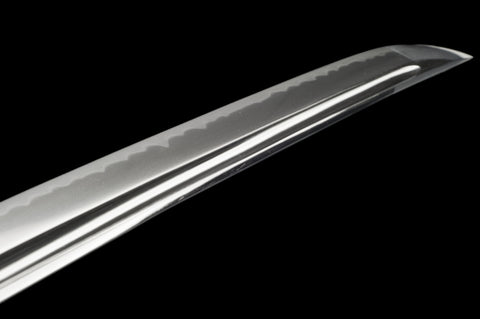
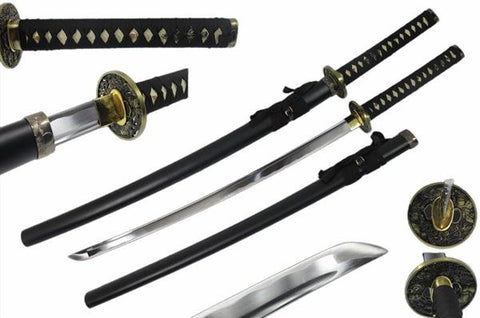
The choice of weapons which you can use to defend your family and yourself is limited, and is controlled by the government in order to stop the defensive weapons from being used in an offensive manor. You cannot and should not walk around with a 50 inch sword strapped to your back, nor can you carry a handgun or any other sort of weapon, even if you claim it’s for self-defence only. In all fairness, I know I feel safer knowing that it’s very unlikely that I’ll be a victim of gun crime.

A weapon is still a weapon, no matter what the intention for carrying one was. If you’re caught carrying a weapon then it’s implied that the intention to use the weapon was there, which can of course mean you were prepared to seriously injure or even kill another human being. Which no matter how you try to spin it, it’s simply not cool.

So when it comes to defending yourself effectively the choices and responsible options available to you are limited. The act of even holding and pointing a knife at a would be aggressor is against the law in the UK, the consequences of doing so can be very serious and are even worse if you actually use it.

The crime rate in the UK has been dropping steadily for the last 20 years, but that by no means that crime is not a problem. Muggings, theft and breaks-ins are still a common occurrence, especially in the major cities.

So, what can you do to defend yourself? You cannot legally carry a weapon with you to defend yourself, we’ll need to look into alternative UK legal methods of protecting ourselves, our children and our families.

One of the most effective non-lethal weapons that has been proven to effectively deter an attacker is the pepper spray. Many police forces and other authorities around the world use these sprays, and they are an extremely effective deterrent. However, pepper spray in the uk is considered an offensive weapon, which makes it illegal to own and carry.

I can wholeheartedly empathise with the law makers in the UK, they have a very hard task of protecting the public from harm, but that is doubly difficult when we consider that any self-defence tool can be just as easily used for offence.

But what about the general law abiding public, surely we have rights when it comes to defending ourselves in some way? The answer is there isn’t a whole lot we can do and unfortunately the criminal element will rarely if ever adhere to the same rules as the rest of us, meaning we’re already at a disadvantage.

The law is very clear when it comes to pepper spray in the UK, it’s laid out in Section 5(1) (b) of the firearms act 1968:
This act prohibits any weapon of any description, designed or adapted for the discharge of any noxious liquid, gas or other substance.

Basically, the law categorically states that any sort of pepper spray, the type typically used by law enforcement around the world, that contains a noxious gas or liquid would be considered illegal to carry and illegal to use by any UK citizen.

So what are the pepper spray uk legal alternatives that any member of the public can use and buy?

The only legal alternative that the public has at their disposal and is in some ways the uk version of pepper spray would be one of the Deterrent Self Defence sprays. These sprays are typically:

  • Non Toxic
  • UK Legal
  • Can be carried by any adult
  • Compact & Discreet
  • Non-Lethal Criminal Identifier
  • Contain No Harmful Chemicals
  • Accurate to 4 Metres
  • Proven to be highly effective

We’ve tested three different types of these sprays and we must say that despite their rather small dimensions, they are very capable of giving any would be attacker pause for thought.

If sprayed at the face they are very capable of completely disorientating an attacker, giving even the most determined attacker pause for thought and kicks in the natural instinct to turn away or move away from the spray. If the spray gets in the eyes the attackers vision will be blurred and it’ll be very difficult for them to see effectively.

Our testing showed that someone sprayed with these canisters will have very little choice other than backing off and trying to protect their face from the stream. Any attempts to wipe away the gel can actually impair the vision further, and can lead to no small amount of panic, I can attest to this directly.

Having a foreign liquid sprayed in your face and then finding it very difficult to see is not at all fun, it’s even worse when attempt to wipe the stuff away and your left with blood red hands, your mind immediately goes into overdrive thinking that your haemorrhaging from your eyeballs. It’s not at all a pleasant experience and that’s with prior knowledge of what’s about to happen. I can only imagine the sheer panic that would engulf an attacker sprayed with this stuff, I would be inclined to do a runner.

To add insult to injury, the gel is very hard to remove completely, and can remain on the skin and clothes for several days afterwards. Some varieties even come with a UV dye, so even when the visible traces are gone, they are still going to light up under a UV light. Both of these factors can make police efforts to find the attacker much easier.

All the products we tested where cheap, under £15 in most circumstances, which for an effective self-defence tool is a brilliant price.

Safehaus Mini Self Defence Spray Criminal Identifier – Review
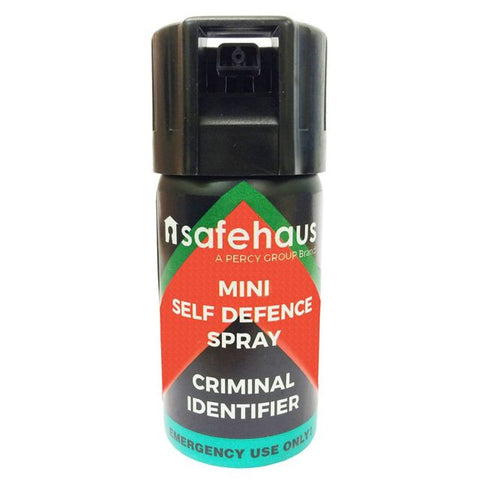
Safehaus Mini Self Defence Spray Criminal Identifier

Buy it from amazon

The Safehaus Mini Self Defence Spray Criminal Identifier comes in a compact but easily handled discrete package. The spray container measures in at 85 × 34 mm, which means it can fit in most pockets and won’t take up much room in a rucksack or handbag. I found it very easy to manoeuvre and find the trigger, even when not looking at what I was doing. The spray is very powerful, I think it easily exceeded 4 metres, but the power is diminished at this range. The stopping power is decent and I can definitely see it stopping a would be attacker.

  • Great range and power
  • Small and easily concealed
  • Good stopping power
  • The gel makes it very difficult to see

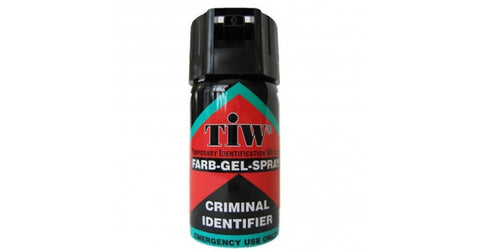
TIW FARB Gel Spray Criminal identifier self defence – Review

farb spray

Buy it from amazon
This farb gel spray is very similar to the Safehaus version, other than a difference between the packaging I would say they are the same product. They share the same dimensions and the spray looks identical. All in all the characteristics are the same, same range, stopping power and characteristics. That’s not a bad thing as I was impressed with the Safehaus version. The good points are it’s possible to get different buying options, such as holsters and multi-packs. Great product.

  • Great range and power
  • Small and easily concealed
  • Good stopping power
  • The gel makes it very difficult to see

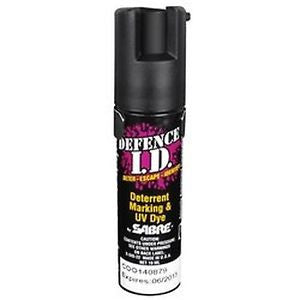
SABRE DID19 19 ml Deterrent Marking Spray – Review

SABRE DID19 19 ml Deterrent Marking Spray

Buy it from amazon
The Sabre system utilises a purple dye unlike the previous two sprays and it additionally has a UV dye included, which should make identifying the attacker easier for the police. The range was around 5 metres, it definitely has a lot of power behind the spray which exceeds the other products we tested, which is perhaps down the slightly larger volume. In my testing the staining ability of this spray was superior to the other two sprays, it took more washes and scrubbing to remove all traces and even then some spots still showed up under UV light. This spray definitely gets my Best Buy award.

  • Fantastic range and power
  • Great staining ability
  • Handy size
  • All round brilliant product

Conclusion

The farb gel spray and the others have been specifically designed to be fully UK legal, they are completely fine to own and carry, so any member of the public has concerns over their safety or for their family members should consider buying one of these defensive sprays.

All of my family has one, as do I.

One of the best things about these sprays is that the red colour will stain the attacker for several days, making them easy to identify and publicly outing them as potential criminal. 


source https://www.bladespro.co.uk/blogs/news/pepper-spray-uk

Wednesday 26 July 2017

The 8 Best Survival Knives

I can barely recall my first kiss, it might have been at a high school disco, but I don’t remember who with. I’m a bit vague as to what I did at my first day of work. Most of what I learnt at school is a distance memory, don’t ask me what themes Romeo and Juliet examines. However, I can tell you exactly where, what I was wearing and who I was with when I got my first survival knife, which was well over 20 years ago now. Recalling the memory brings back some very fond childhood memories with my dad, which I hope someday to recreate with my own son. My first knife was an old sheath knife with an antler horn handle, it was a bit rusty and wasn’t particularly sharp, but it signified that I was to be trusted with a potentially dangerous tool and satisfied some very primal urges. My long love of knives began at this time and I’ve extended my collection significantly since then.

If a film contains a survival knife you can bet that it’s going to be something cool, but is there really any practical application to having a survival knife, if you have one in the real world would it ever get any use?
Gerber Survival Knife
gerber survival knife
ontario survival knife

In spite of our advancements in medicine, travel, technology and communications, millions of people around the world are thrust into disaster situations and are at the mercy of the elements or assistance from strangers. Additionally, thousands of people globally accidentally find themselves in a unexpected random life and death situations where the difference between life and death can depend on a little knowledge and the tools and resources available. So what? It is prudent, whenever possible, to keep irreplaceable survival tools close at hand just in case the unthinkable happens. Possibly the most important tool you can have is a quality survival knife. No other tool or piece of equipment can replace the survival knife, it’s proved itself throughout history as a must have piece of kit. Since modern man started making its way out of Africa, we have always relied on some sort of cutting tool to meet our most basic survival needs: shelter, fire, food and water. Over thousands of years the cutting tools have developed from simple stone tools into beautifully engineered survival knives. However, it should be noted that not all survival knives are created equally.

I’m fortunate enough to have the opportunity to try out many types of survival knives at BladesPro on an everyday basis. I can even take a selection with me when my partner and I go for a day or weekend into the wilderness. However, I realise this is not possible for most people. At the very least, a survival knife should be available when you’re likely to need it most i.e. when you’re out and about in the wilderness. The more often you have it with you, the more often you’ll likely find a use for it, even if it’s not a survival situation. I always have one in my car as who knows when you might need to cut your seat belt or smash a window. So regardless if you’re backpacking, fishing, hunting, skiing, hiking, boating or camping, a good knife is a trusted irreplaceable companion. I’m rarely if ever out and about without one.

Survival knives are as the name implies, knives that help you to survive. A well made survival knife can have hundreds of uses, including:

  • Cutting/Slicing
  • Splitting
  • Signaling
  • Shelter Building
  • Self-Defense
  • Prying Tool
  • Make-Shift Screwdriver
  • Hunting Weapon
  • Hammering
  • Food Prep
  • First Aid Tool
  • Fire Making
  • Digging

When it comes to buying a knife, not just a survival knife, buying something well built and functional is far more worthwhile than a knife with lots of bells and whistles. Leave the survival knives with 100 accessories for the films and buy something which is well designed and built to last. Function out performs aesthetics. Your number one priority is how the knife performs, which in itself depends on a variety of time tested key features.

The Six Defining Features of a Survival Knife

Size

Despite what you might have been told, size does indeed matter. However, bigger is not always better. If your blade is too big, you’ll find that your knife is impractical for work which requires precision, such as carving delicate snares sets or preparing small game.
On the other hand, a small knife might not be up to the task of chopping or batoning. Batoning involves striking the back of your knife with another object in order to drive it through stubborn or thick wood. This technique is invaluable if you plan to use the blade for splitting small logs or for cutting through the limbs of trees.

From my own personal experience, I find that a knife between 20 – 30 cm in length is ideal. You should look for something with a 10 – 15 cm blade in order to be effective.

Fixed Blade

A fixed blade survival knife is undeniably more reliable than a standard folding knife. While a good folding survival knife is a great tool to keep in your pocket for everyday use, a fixed blade reigns supreme when it comes to meeting demands of a genuine survival scenario. 
Any moving parts of joints represent a potential weakness in a knife. You should wherever possible work to minimise your risk exposure when in a survival situations, you can do this by picking a tool which is better suited to taking the abuse chopping, prying, pounding and cutting will impart on a knife.

Full Tang

Since we’ve established that a survival knife should be fixed blade, we should also establish that a survival knife needs to be full tang. The term full tang means the knife and handle are made from one piece of continuous metal. A grip is normally attached to the handle to improve the comfort and the ability to actually grip the knife. A full tang knife is substantially more robust than an equivalently made partial tang knife such as half tang, push tang or rat tail tang. 

A partial tang knife is prone to loosening over time, often developing play in the handle, especially when the knife is subjected to demanding jobs such as chopping, prying or batoning. When a partial tang blade becomes loose, it can be extremely difficult to effectively fix them without specialist tools, it also becomes a liability and can easily catastrophically fail and cause serious injury. In comparison, a full tang knife still functions as a knife even if the handles come loose, it can even be wrapped in paracord or rags in order to create a replacement grip. 

I know off no advantage offered by a partial tang knife when compared to a full tang blade, assuming the materials used are identical. It’s very difficult to completely break a single piece of continuous solid metal. It can usually be quite easy to spot a full tang knife, just look for the metal handle to be sandwiched between the knifes scales.

Sharp Pointed Tip

This might be an clear decision for some of our readers, but make sure you pick a survival knife with a sharp point. I’ve seen many so called survival knives with rounded, hooked or angles tips. So despite what you might have been told, there are many good arguments as to why your survival knife should have a sharp pointed tip. The first is its ability to pierce things. Any knife without a sharp tip will not be as effective at piercing thick fur, hide or any other similar material. 

As such, a spear pointed knife can by itself be used a hunting weapon, either when lashed to a pole in order to create a spear or by itself. If the scales on your survival knife can be easily removed then the blade of the knife can be more easily seamlessly integrated into a staff to form a spear. 

In addition to its piercing abilities, a sharp pointed knife presents several advantages versus any other type of blade tip. Below I’ve compiled a short list of tasks which a sharp pointed knife is especially good at.

  • Drilling or notching wood
  • Repairing clothes or gear
  • Removing splinters
  • Detailed picking or prying
  • Cleaning and preparing small animals such as fish
  • Processing wild edibles
  • Accessing bait in otherwise difficult to reach areas

Single Edged Blade

A survival knife should not be sharpened on both sides in the style of a dagger. A double edged blade is rarely if ever preferable over a single edged knife in the vast majority of survival situations. In fact, it can be a real disadvantage. 

Not only is it preferential to have a single edged blade, but it’s far superior to have a survival knife with a flat spine, one which has been ground at a 90 degree angle to the blade. A flat spine is perfect for striking a ferro-rod, while a bevelled or rounded spine makes this task almost impossible.

When out in the woods or camping, I will often use my knife to baton through larger pieced of weed. Regardless of whether I’m splitting wood for a fire or constructing a shelter, a knife which was sharpened on both edges would make this task much harder.
With a flat backed knife I can also use my thumb as a rest for increased control when performing tasks that require a high degree of accuracy, such as notching triggers for traps or creating snares. This is not something I would want to attempt with a double edged knife as the risk of injuring myself is greatly increased.

Substantial Pommel

In case you didn’t know, the pommel is the bottom of a knifes handle, and may also be referred to as the butt. I will often use the pommel on my survival knife for some jobs that require a light amount of hammering. It’s great for driving in shelter pegs. I’ve also had circumstances when I’ve been able to use the point of my knife to create a temporary fishing hole in ice by hammering the pommel of my knife with a piece of wood in order to push the tip of the knife into the ice. You might find that some knives are designed with a rounded or hooked pommel, this shape is far from ideal for hammering. If you want to get the maximum amount of use out of your survival knife, opt for one with a substantial well designed pommel.

Bottom Line

Use the criteria laid out above as the groundwork for picking the perfect survival knife. At the end of the day, only you can decide what you really need from your survival knife and what features you can do without. Anything that’s not covered in the criteria above pretty much come down to personal preference.

There are more than a few survival knives out there that cover every one of the six must have features, yet they may be aesthetically different and diverse in their appearance. There are numerous design and style options that effect how the knife looks but also have very little bearing on the survival knives functionality. Some of these features may include:

  • Blade Steel (Carbon or Stainless – varying options with varying results)
  • Blade Style
  • Blood Groove
  • Colour or Finish
  • Decorative Milling
  • Handle Material (Rubber, Micarta, Bone, Antler, etc…)
  • Jimping
  • Knife Designer/Manufacturer/Brand
  • Lanyard Holes
  • Serrated or Non-serrated Blade
  • Sheath Design and Style
  • With or Without Finger Guards

Final Words

A survival knife is just a tool and like any other tool its effectiveness is often dictated by the skills of whoever is wielding it, it’s not a magic wand nor will it automatically save your life. Skills only come with repeated use and practise, even the most talented tradesman, musicians or actors spend years practising their trade to become proficient. 

Don’t buy a survival knife just as a piece of decoration, it is a tool that needs and should be used. Modern man has always used cutting blades, they have helped our species evolve and influenced how we shape the world around us. No other tool has had a bigger impact on how we hunted, fought, built or survived in the wilderness. From early humans wandering the plains of Africa to modern soldiers on the battlefield, there is no other relationship like that between a man and his trusty blade. Make sure you pick yours carefully.


source https://www.bladespro.co.uk/blogs/news/the-8-best-survival-knives

Thursday 20 July 2017

Guide to Sword Steel – Everything You Didn’t Know You Needed to Know

When it comes to picking a sword, it’s not uncommon to hear the question “What is the best sort of sword steel”. This type of the question is not easily answered, the best sort of steel depends largely on what the sword will be used for and what budget the buyer has. For example, someone that is looking purely for a decorative display piece will likely want a steel that remains shiny with very little maintenance. A stainless steel sword will probably meet this buyers requirements, the sword will remain bright and polished for years, however the sword will be useful for very little else apart from hanging on the wall. If on the other hand the shopper would like a real battle ready sword, one which is capable of taking and retaining a cutting edge, then the choice of steel is a little harder. Additionally, we may need to consider sword tempering and forging methods. We’ll go into more depth in the article below.

Sword Tempering

Steel Billet

A sword begins its life as a billet of steel, this billet is heated and roughly formed into a sword like shape. This process may take a couple of hours, or a couple of dozen hours, largely depending on the size and type of sword required. Once the sword has been shaped into its final form, the sword will most often go under a procedure called tempering. Tempering is a key aspect of producing a functional sword, the steps involved are quite technical in nature and have a significant impact on the swords capabilities. Essentially tempering involves heating the sword to pre-defined temperatures, the sword is then rapidly cooled in oil or water (but not too rapidly). The tempering process is key to producing a hardened and tough blade. However, if the sword is cooled too quickly then the sword may end up being brittle or cracking. Many thousands of swords have met an untimely end during the tempering process. Sword tempering will have one of the biggest effects on the final swords capabilities, sometimes more than the type of steel chosen.

Most swords are either mono hardened or differentially hardened. In a mono hardened sword, the whole sword is heated to the same uniform temperature and cooled at the same rate. In a differentially hardened sword, clay or other similar pastes are added to the blade in order to insulate part of the sword from the heating and cooling process. When this occurs the clay covered part will cool at a slower pace compared to the exposed part of the blade, this works to increase the hardness of the exposed blade while allowing the covered portion to remain flexible. The differential hardening process is very common in Japanese swords such as a Samurai Sword, creating the distinctive Hamon line. A Hamon line is the separation between the hard cutting edge and the softer flexible spine. A flexible spine allows the sword to absorb impacts which would otherwise dent or crack the sword.

Sword Hamon

Mono tempered swords are typically marketed at beginners, they are able to take more abuse and are less likely to chip or become permanently misshapen. Despite the association with beginners, there are a lot of good arguments for buying a mono tempered sword over a traditional differentially tempered variety. Most of the swords originating from medieval Europe where forged using mono tempering methods, which was better suited to the slashing blows against armour and shields, the mono temper is better suited to taking punishment without chipping or breaking.

If you’re experienced using a sword for cutting, then you may wish to consider a differentially tempered. These swords typically have a harder cutting edge, but you’ll need to be wary of form and technique, a misguided sword stroke may lead to the blade being chipped or irrevocably damaged.

Most experienced sword makers today are well versed in the art of sword tempering, so there’s little concern around receiving a cracked or chipped sword, simply choose the tempering you’d like.

Sword Steel Guide

Now that we’ve managed to cover tempering and what the means for your sword, we can move onto the types of sword steel that are available. Picking a steel for your sword is only really important if you’re looking to have a battle ready sword. If you’re only looking for a display sword then you’re probably better of getting a sword made from stainless steel, they are cheaper to buy and require very little maintenance, they are however not recommended for any substantial cutting. I’m not trying to imply that all stainless steel swords are terrible for cutting, but I wouldn’t expect to slice through 3 inches of bamboo with one either.

So what about carbon steel? Carbon steel is the go to sword steel for battle ready swords, at the lower end of the scale we start at 1045 carbon steel. The number assigned to the carbon steel describes the carbon content of the metal. For example, 1045 is classed as medium carbon content and will contain 0.45% carbon. Continuing with the naming convention, 1060 carbon steel has 0.60% carbon content and so on. Most carbon steel swords you’ll find for sale are 1045, 1060 or 1095. Some sword smiths are embracing newer types of steel for use in swords such as 9260 and other types of spring steel, these have added silicon which increases the blades toughness. This naming convention is very similar to the carbon steel, the key difference is that the first two numbers have been changed. The 92 in 9260 signifies that Silicon Manganese has been incorporated into the steel. The chart below shows all the different sorts of steel that are available, not all are used in sword making.

10XX
Carbon steels
Plain carbon, Mn 1.00% max
11XX
Resulfurized free machining
12XX
Resulfurized / rephosphorized free machining
15XX
Plain carbon, Mn 1.00-1.65%
13XX
Manganese steel
Mn 1.75%
23XX
Nickel steels
Ni 3.50%
25XX
Ni 5.00%
31XX
Nickel-chromium steels
Ni 1.25%, Cr 0.65-0.80%
32XX
Ni 1.75%, Cr 1.07%
33XX
Ni 3.50%, Cr 1.50-1.57%
34XX
Ni 3.00%, Cr 0.77%
40XX
Molybdenum steels
Mo 0.20-0.25%
44XX
Mo 0.40-0.52%
41XX
Chromium-molybdenum steels
Cr 0.50-0.95%, Mo 0.12-0.30%
43XX
Nickel-chromium-molybdenum steels
Ni 1.82%, Cr 0.50-0.80%, Mo 0.25%
47XX
Ni 1.05%, Cr 0.45%, Mo 0.20-0.35%
46XX
Nickel-molybdenum steels
Ni 0.85-1.82%, Mo 0.20-0.25%
48XX
Ni 3.50%, Mo 0.25%
50XX
Chromium steels
Cr 0.27-0.65%
51XX
Cr 0.80-1.05%
50XXX
Cr 0.50%, C 1.00% min
51XXX
Cr 1.02%, C 1.00% min
52XXX
Cr 1.45%, C 1.00% min
61XX
Chromium-vanadium steels
Cr 0.60-0.95%, V 0.10-0.15%
72XX
Tungsten-chromium steels
W 1.75%, Cr 0.75%
81XX
Nickel-chromium-molybdenum steels
Ni .30%, Cr 0.40%, Mo 0.12%
86XX
Ni .55%, Cr 0.50%, Mo 0.20%
87XX
Ni .55%, Cr 0.50%, Mo 0.25%
88XX
Ni .55%, Cr 0.50%, Mo 0.35%
92XX
Silicon-manganese steels
Si 1.40-2.00%, Mn 0.65-0.85%, Cr 0-0.65%
93XX
Nickel-chromium-molybdenum steels
Ni 3.25%, Cr 1.20%, Mo 0.12%
94XX
Ni 0.45%, Cr 0.40%, Mo 0.12%
97XX
Ni 0.55%, Cr 0.20%, Mo 0.20%
98XX
Ni 1.00%, Cr 0.80%, Mo 0.25%


In this chart the first 2 numbers describe the type of steel and the last two numbers signify the carbon content. It’s easy to be confused by all the options available. To simplify matters, most of the sword we’ll be interested in are made from either 1045, 1060 or 1095 carbon steel, with a couple of exceptions thrown in. In the rest of the article we’ll cover the most commonly used sword steels available today and what properties they impart to the sword.

Types of Sword Steel

1045 Carbon Steel

1045 carbon steel has a carbon content of 0.45%, while a steel such as 1095 has 0.95% carbon content, contrariwise 1045 has more manganese content than 1095. This means that 1095 carbon steel is harder and better able to resist wear and tear, but it’s also less tough. 1045 is capable of taking an edge, but 1095 is easier to sharpen and the edge will last longer. If you’re a beginner, you might want to pick a 1045 carbon steel sword, they are better suited to taking abuse and are most often the cheapest battle ready sword available.

1045 Carbon Steel

1050-1055 Carbon Steel

1050 carbon steel is a robust and resilient medium-high carbon steel. It has a carbon content of 0.50% and is good choice for anyone looking for a tough tool such an axe, hatchet or sword.

1055 carbon steel is right on the dividing line between steel classed as medium carbon content and steel classed as high carbon content. Typically 1055 carbon steel will have a manganese content between 0.60% and 0.90%. These factors contribute to any sword made from 1055 steel being incredibly tough and durable. When a 1055 sword is expertly tempered, it produces a crystalline structure which is free from excess carbides, in turn this avoids the brittleness which is common with high carbon materials. 1055 steel is very well suited to applications where impact resilience and outstanding toughness are highly desirable. This steel is capable of producing blades which are incredibly resilient to damage.

1060-1065 Carbon Steel

1060 and 1065 carbon steel is a fairly common steel used in battle ready swords. The carbon content is between 0.60% and 0.65%, with manganese being the only other addition. This sort of carbon steel is very tough and is able to take and retain an edge very well.

1065 is an ideal steel for differential hardening, often producing a visible temper line on the finished sword. Of course any hardening that takes place will also reduce the impact resilience of the finished piece.

1075 Carbon Steel

1075 carbon steel would be considered high carbon content steel. 1075 steel is excellent at taking and retaining an edge, the blade is very tough and is very resilient. The steel is very well suited for swords, axes, machetes, knives or any other sort of blade which requires a sharp edge and is subject to significant usage.

1095 Carbon Steel

1095 carbon steel is a standard production carbon steel, the steel is characterised by it’s low resistance to corrosion and it’s medium edge retention. A sword made from 1095 carbon steel is very easy to sharpen to a razor sharp long lasting edge. When this steel is expertly tempered, the sword is has amazing properties, no other steel can compare when expertly sharpened. We do not recommend this sword to beginners as it needs to be cared for correctly to avoid rusting and can be damaged if not used with proper technique and methods. In the correct hands a battle ready 1095 steel katana is incomparable.

65Mn Steel

65Mn steel is a widely used and available Chinese steel that was created in order to provide good hardness and increased wear resistance. The carbon content of this steel is classed as medium, allowing for a high degree of toughness and resistance. 65Mn steel also contains manganese which also improves the swords hot working characteristics, meaning it’s easy to forge into sword blades, knives and any other tool which sees significant impacts.

1566 Spring Steel

1566 Spring Steel is a high-carbon and manganese content steel. The steel is very well suited to differential hardening tempering processes. The hardened steel is characterised by a consistent crystalline microstructure which ensures a resilience and long life for any demanding tools that require an edge.

T-10 Steel

T-10 steel is the Chinese created equivalent of the western 1095 steel, but with a crucial difference which sees silicon being added to the alloy mix in order to improve the overall strength of the steel and additionally to increase its wear resistance. T-10 steel swords take to tempering very well, producing a sword which takes and retains an edge. In the same vain as 1095 steel, T-10 steel has low resistance to corrosion, therefore must be carefully looked after in order to avoid rust.

5160 Spring Steel

5160 is a very high end steel which is increasingly popular with sword forgers. The steel is a fairly generic spring steel with the added benefit of chromium, the additional of chromium works to harden the metal. 5160 steel is well renowned for its edge holding capabilities, but it’s even better known for its extreme toughness. The steel is often used in swords or knives and tomahawks.

440 Stainless Steel

440 stainless steel is a form of high grade cutlery steel, which typically has a higher carbon content, allowing for the steel to better take and retain an edge. When 440 steel has been correctly heat treated in can become one of the hardest stainless steels available. Due to its relative cheap price and hardness, most display only pieces and replica swords you’ll encounter will likely be made from 440 stainless steel. 440 is commonly available in four distinct grades: 

  • 440A contains the least amount of carbon and is the most corrosion and stain resistant.
  • 440B contains slightly more carbon and is slightly harder but also slightly less stain resistant.
  • 440C has the largest amount of carbon content out of the 440 grades, it’s the strongest 440 steel and is the most desirable type for swords or knives. The exception to this is knives that are designed for use by divers, these will invariably be made from 440A steel.
  • 440F is a free machining variant of 440 steel and it contains the same carbon content as 440C

Stainless Steel

3CR13 Steel

3CR13 Steel is most commonly used for knives and is a form of Chinese stainless steel. It is similar in many respects to 420J2 (AUS 4) stainless steel..

L6 Bainite Steel

L6 steel is a brilliant steel which is suitable for many applications, it’s equally practical for knives as well as swords. When used in a sword, L6 steel will likely be heat treated until a Bainite microstructure is formed, this process is complicated and expensive to perform. The steel is very popular in for use when forging Japanese Katana and its influence is spreading to other forgers creating non-Japanese swords. As the process spreads we’ll likely see efficiencies in formation of Bainite, leading to a reduction in the cost and the swords will likely see mass market distribution.

It relatively uncommon to see L6 used in production knives or swords, the steel is very difficult to work with and as such it’s really only found in custom pieces or high priced items.

Damascus Steel

Damascus steel swords are highly desirable due to their inherit beauty and practical application. Modern Damascus swords are formed from special types of billet steel. The billet steel is made up from several types of layers of steel and iron welded together, which is what creates the unique pattern present in Damascus steel.

Damascus Steel

Folded Steel

Folded steel swords are fascinating for their aesthetic attractiveness and their traditional heritage. One of the best known aspects of the Japanese traditional sword forging process involves folding the steel, the process involves repeatedly folding and hammering out the steel billet. Traditionally the process was performed in order to even out the carbon content of the steel throughout the sword, now the process is mostly performed due to aesthetics and to adhere to traditional techniques. The process is heavily referenced in much of Japanese popular culture is not synonymous with Japanese sword forging.

K120C Powder Steel

ASSAB K120C powder steel is made in Japan under a license agreement from SSAB of Sweden. The steel is typically considered to be similar to 1095 carbon steel.

Aluminium Swords

Most swords produced in Japan are not made of steel as you would expect, in fact they are invariably made from aluminium alloys. The overriding reason for this is the cost of a true Japanese sword is far in excess of what most people can afford. Japanese sword laws are incredibly strict and forges can make a maximum of two swords a month, which pushes the price up to a significant amount. This forces most martial artist practitioners to opt for a aluminium sword. Aluminium is significantly cheaper than a steel sword, but it also cannot be sharpened and doesn’t have the same heft as a real steel katana.


source https://www.bladespro.co.uk/blogs/news/guide-to-sword-steel-everything-you-didn-t-know-you-needed-to-know

Monday 10 July 2017

The Best Recurve Bows Available

If you’ve decided you want to buy a recurve bow, choosing what kind of bow need not be a challenge. If you take a look at all models and options available, you might be forgiven for feeling slightly overwhelmed and confused. This is completely expected for a beginner, but the truth of the matter is no matter what bow you pick as an amateur archer, you’re more than likely going to be happy with the results. It’s still worth understanding what you’re going to use the bow for to help narrow our choices. 

American Hunting Recurve Bow | 20-36lbs | Colour & Weight Options
Vertex Aluminium Alloy Recurve Bow | 30-50lbs
Traditional Aluminium Alloy Recurve Bow | 30-50lbs
 Professional Folding Straight Bow | 40lbs

Why Do You Want a Recurve Bow?

Are you only planning on using he bow for target practise, or would like to try hunting as well? (please bear in mind that hunting with a bow is not legal in every country)
If you only intend to use the bow for target practise then you can probably pick just about any bow you want that fits with your budget. You could just simply pick one of the bows recommended below that fits in with your budget, looks good and you’ll be all set to fire some arrows down a range within a couple of days.

While every recurve bow will work for shooting at targets, not all bows are good candidates for hunting. However, the number one defining features which dictates whether or not a bow will be suitable for hunting is the draw weight. The model, features and colours are all secondary to the draw weight of the bow. In case you didn’t know, the draw weight refers to the amount of force it takes to pull a bow string over a set distance, this distance is universally set at 28 inches for recurve bows. The draw weight directly relates to the power of the bow, so the higher the draw weight, the faster and further the arrow will travel. This is very important for hunting for a couple of reasons.

When you’re on the range shooting at targets, you bow not need to be especially powerful. Your arrow is only required to penetrate a flimsy cardboard or foam target, which obviously does not require a lot of energy. However, when you’re hunting, your arrow needs to penetrate tough skin, layers of fatty tissue and on occasions bone as well. So how do you ensure your bow is powerful enough? The answer is to simply pick a recurve bow which has a draw weight which exceeds 40lbs. It is of course possible to use a less powerful bow for smaller game such as rabbits, in which case a 30lb bow would probably suffice. But for anything larger you’re going to need a more capable bow. The main problem is that not all beginners can draw a 40lb bow. However, after a few weeks off training and building muscle, nearly everyone will be able to draw 40lbs or more. 

To Quickly Recap

  • If you’ll only ever use your recurve bow for target practise, then you can safely pick just about any bow that you like the look off. 
  • If your main priorities are hunting, then you can still pick any bow that you’d like, as long as the draw weight is at least 40lbs. 
  • It’s worth bearing in mind that longer bows are generally more accurate, however, they are also more unwieldy. A long bow is probably not something you’d want to lug around in the wild.

Do You Need a Take Down Bow?

When you come to choosing your recurve bow, you’ll probably want to consider getting a take-down bow. A take-down bow is basically a recurve bow which allows you to remove the limbs from the riser. There are three good reasons for choosing a take-down recurve bow over a traditional ‘one piece’.

  1. Take-down bows are much easier to transport. Since the limbs can be removed from the riser, the resultant pile of parts is much more manageable and can most often fit inside a standard rucksack. 
  2. A take-down bow is far easier to service. If any one component breaks or needs to be repaired, then you can just send that one bit away for repair or replacement, not the whole bow. 
  3. Lastly, a take-down bow is upgradeable. For example, let’s say when you first buy your bow all you want to do is shoot some arrows down the range, so you opt for a 30lbs bow. If after a few months you would rather have a 40lb bow, all you need to do is replace the bows limbs. Everything else can remain the same.

How Heavy Should My Bow Be?

The draw weight of the bow is not the only thing worth considering. The physical weight of the recurve bow is worth taking into account in your decision buying process. When you’re shooting, you’ll often need to keep the held out at arms-length for long periods of time, which can become incredibly tiring. The vast majority of recurve bows are between 2 and 3.5 lbs, which is a suitable weight for a beginner. If you’re not sure what to go for, try and get a bow that weighs 3lbs or less. However, don’t let this influence your buying decision too much.

How Big Should My Recurve Bow Be?

Ideally you’ll want to pick a recurve bow which is at a minimum twice your draw length. For example, if your draw length is 28 inches, you’ll want to make sure your bow is at least 56 inches in length.

Should I Buy Any Accessories?

You may wish to consider investing in some accessories for your recurve bow, for example a bow sight or release aid. Many recurve bows will come with pre drilled holes to hold attachments, making the whole process easier. Many archers prefer not to have any accessories, instead relying on experience and skill to shoot accurately. However, there is no harm in choosing to buy some accessories, even it’s a simple peep sight or adding an arrow rest, you might find it makes your shooting experience that much easier.

What Arrows Do I Need?

One of the first steps you need to consider before picking your arrows is to find out your draw length.

Arm Span Draw Length

The arm span method of calculating your draw length is one of the easiest methods to follow. Firstly spread your arms out, making sure they remain parallel to the floor and while keeping your back flat. Next have someone measure the distance between the two middle fingers on each hand, finally divide this measurement by 2.5. The resulting figure will give you a pretty solid approximation of your draw length. For example, if your arm span is 70 inches, dividing 70 by 2.5 results in 28. In this case your draw length is likely to be 28 inches. If you prefer to work in cm, the same formula can be used.

What Length of Arrow?

Once you’ve found your draw length using the technique above, you’ll need to add 1 to 2 inches to that, this new number will be your perfect arrow length. For example, if you’ve calculated that your draw length is 28 inches, you will need to use arrows that are between 29 and 30 inches.

Arrow Weight

Once you’ve found the length of the arrows needed, you’ll next be faced with the weight of the arrows required. Generally speaking, if you’ll only ever be using your bow for target practise you can choose arrows which match your recurve bows draw weight. So if your bow is rated for 45lbs draw weight, you’ll want to get arrows rated at 45lbs or above. The only exception to this is if you’re planning on hunting. If you want to hunt with your bow you’ll probably want to pick arrows that are rated slightly higher than your draw weight.

What Other Accessories Do I Need?

If you’re new to the sport of archery, or if you’re a pro returning from a hiatus, there are likely a few accessories that you cannot do without.

Archery Must Buys

There are a few things that it’s impossible to do without, they are archery must haves, whether you’re just starting out or you’re looking to get involved in competitions, you’re going to need these accessories.

The Recurve Bow

It should be obvious, but you need a bow. You cannot participate in the sport of archery without a bow, it doesn’t need to be expensive, it’s better to get something that meets your budget.

The Bow Stringer

The bow stringer is a must have piece of kit that every recurve archer should have. It’s the only way to string a bow safely and consistently. You might have seen people using the step through method to string a bow, this is both dangerous to you and the bow. Use a bow stringer. Consider the Webbing Saddle Stringer.

Arrows

You need arrows to use with your new recurve bow. Buy at least six to get you started.

Nocking Point

A nocking point provides a consistent place on your bow string to nock your arrow. The nocking point is important for two main reasons. Firstly, it’ll improve your accuracy as you’ll always be shooting the arrow from the same location. Secondly, it helps protect your hand from being nicked from the arrow fletching. I can thoroughly recommend Saunders Archery Bow String Nock Points.

Targets

Once you’ve gathered all of the above, it’s time to put it all together and shoot some arrows. So, what do you plan to shoot at? Targets are made for being shot at, they are therefore the ideal choice. Targets can be a crudely drawn picture or a more complicated bulls-eye target, whatever you prefer, you’ll need a backstop to stop your arrows. You can buy foam blocks especially made for the purpose, or if you have access to hay bales they can also suffice. Check out Lightweight Archery 60x60cm Self Healing Foam Target.

Nice To Have Accessories

This list contains items that are nice to have but are not essential to shooting your recurve bow. Most of these items are related to improving your comfort, so for that reason alone they are probably worth investing in, or at least adding them to your shortlist of things to buy.

Arm Guard

An arm guard is there to protect your sleeves, skin and hair and keep them out of the way of the bow string as you release the arrow. It does this by covering your forearm, and even sometimes your whole arm in a protective sleeve. As a beginner, you’ll be prone to accidentally dragging the bow string along your arm, this can hurt, so it’s best to protect your arm as you learn to prevent doing this. Recommend option MyArmor 11.8" Arm Guard.

Finger Tabs

If you shoot your bow often enough without a finger tab, it’ll cause your fingers to blister, which can be quite painful and may lead to problems further down the line. You can avoid this by wearing a leather glove or by using finger tabs. A modern finger tab can include spacers which additionally help the archer from pinching the arrow. The Leather Traditional Archery Gloves is a great option.

Arrow Rest

Many bows already come with an arrow rest installed. If it doesn’t, you’ll definitely want to consider purchasing one early in your archery hobby. The arrow rest as the name suggests is what the arrow rests on as it is drawn, the rest can be a simple static rest, or something more complicated that falls away as the arrow is released. It is possible to use your hand as an arrow rest, but long term you’ll want to buy one.

String Wax

If you have an opportunity to study your bowstring closely, you’ll see its made up of thousands of tiny fibres. If the bowstring is not full lubricated, these fibres rub against each other causing friction, which can cause the bowstring to snap. To prevent this from happening, it’s important to regularly wax your bow string, this keeps the fibres lubricated, but it also helps to protect the string from dirt, dust and water. It’s recommended to wax your bow string at least once every 4 weeks, or every two if possible. Bohning Tex-Tite Bow String Wax is a great option.

Completely Optional Accessories

The rest of this list is comprised of accessories that are not required, but they might make your archery more enjoyable. For that reason alone they are worth considering for further down the line.

Recurve Bow Sight

A sight is used for aiming your bow. Most recurve bows will not come with a sight, this is partly due to most recurve bow archers preferring a more challenging traditional shooting experience. Unlike compound bow archers, most recurve bow archers prefer a simpler archery experience. However, there’s no reason why you shouldn’t invest in a bow sight. A bow sight can help a novice archer to shoot better understand were an arrow is likely to end up based on were it’s being aimed.

Quiver

A quiver is simply a container for holding your arrows. Some archers will just stick the arrows into the ground in front of them, pulling each one out as required. This can be a bit rough on the arrows, especially in rocky ground, so if you can invest in a quiver it’s something I would recommend. Some types of quivers attach directly to the bow itself, which is especially useful for hunter, while other quivers may attach to your waist of on your shoulder. It’s by no means an essential piece of kit, but it can make your life easier. I can recommend the G4Free Archery Deluxe Canvas Back Arrow Quiver.


source https://www.bladespro.co.uk/blogs/news/the-best-recurve-bows-available

Wednesday 5 July 2017

Six of the Best Ghillie Suite's Available

You’ll have no doubt seen snipers featured in films or on the news, you might have even seen the uncanny looking half man half bush hybrid making an appearance. The weird looking human can owe his look to the ghillie suit. Gillie suits are designed to allow a sniper blend into the environment, so much so that you’d be hard pushed to spot one in the wild.

Top Ghillie Suite's

Dark Green Woodsman Bio Ghillie Suit

Ghillie Suit

Light Green Woodsman Bio Ghillie Suit

Light Green Woodsman Bio Ghillie Suit

Woodland Sniper Ghillie Suit

Woodland Sniper Ghillie Suit

Jungle Camo Huntsman Camo Ghillie Suit

jungle-camo-huntsman-camo-ghillie-suit

Army Ghillie Suit 3-D

Army Ghillie Suit 3-D Camo System 3 pcs. Airsoft Sniper Hunting Fishing Woodland

Helikon Camouflage Ghillie Suit Digital Woodland

Helikon Camouflage Ghillie Suit Digital Woodland


The word ghillie originates from Scotland, where it was used to describe a type of game warden. A ghillie would be responsible for guarding the game on the land they were employed to protect. Occasionally a ghillie would be tasked with capturing a deer alive, which they would accomplish by lying perfectly still in wait for hours until a deer to approach. Once the deer was within range, the ghillie would break from cover and wrestle the deer until it was under control. The poor deer could then be returned to lords keep, where it could be shot in relative comfort in a pretend hunt.

A modern day ghillie suit is essentially a specialised military uniform which has been modified to meet a snipers specific needs. The underside of the ghillie suite is often reinforced, waterproofed and padded in order to maximise the comfort of the sniper tasked with lying in the same spot for hours or even days. Camouflaged netting can be applied to the suit, which can then have shredded burlap or other similar materials applied. Ghillie suits are most often coloured to match the surrounding environment. Additional elements such as branches, vines, twigs, sticks and grass can also be incorporated into the netting to further enhance the camouflage and obfuscate the wearers outline.

It’s very rare to encounter a straight line in nature, so the standard equipment given to soldiers, such as antennas and rifles often stands out and give away the position of an otherwise camouflaged soldier. To combat this, snipers may apply ghillie suit methods of concealment to their weapons, wrapping rifles in canvas and adding pieces of cloth to break up the outline of the gun.

A soldier is trained to be aware of unusual or out of place things in their surroundings that could signify a risk or threat. Humans are one of the most recognisable outlines in nature. Spotters and snipers are all taught to look for colour and contours when attempting to spot potential threats in the terrain. A ghillie suit attempts to combat this by breaking up the easily recognisable human outline, allowing for the wearer to blend seamlessly with the surrounding flora. “With a good ghillie suit,” Army Ranger Sniper explains, “you could hide in a yard and people wouldn’t be able to see you.”

Ghillie suits first appeared in the early 20th century. A visionary officer in the Scottish army named Lord Lovat used two specialist companies of solider in 1899 in South Africa. He picked out soldiers from the highlands that had ghillie experience, reasoning that their existing wilderness skills could be supplemented by additional training to create a formidable force. These men were tasked with reconnaissance and scouting during the Boers war.

Lord Lovats scouts soon proved their worth in the field, significantly improving the intelligence gathered by utilising their ability to stay hidden close to the enemy for days at a time. The Lovat scouts continued to be used in the way during WWI and WWII. Around 1916, an elite contingent of the Lovats scouts was turned into a sniper unit. This unit was distinguished in its ability to gather intelligence and single out and pick off commanding officers within the enemy troops. The unit proved to be so successful that the British army attempted to provision every battalion with their own contingent of Lovat Scout snipers. The scouts proved to be a critical component of the reconnaissance of enemy positions, resulting in more effective offensive strikes against the opposition army.

Today, the methods and tactics employed by the Lovat scouts have evolved are widely adopted by armies around the world. The legacy of the Scottish ghillies lives on in the ghillie suit.


source https://www.bladespro.co.uk/blogs/news/six-of-the-best-ghillie-suites-available