Tuesday, 27 June 2017

Top 5 Paracord Bracelets of 2017

When you’re in the outdoors hiking or trekking, there’s lots of kit you need to take. Depending on how long you’ll be away, you might take a backpack, plenty of water, food, a tent and a lot more equipment.

Anything you do take should be easy to use, lightweight and should take up as little space as possible. Enter the paracord bracelet – also known as a survival bracelet. It’s so small and light, you won’t even notice it’s there most of the time, but this tool can be a true lifesaver, so it’s worth looking into getting one.

With an almost unlimited number of ways to use a paracord bracelet, it’s a great accessory and can be worn comfortably around the wrist until you need it.

What is a paracord bracelet?

A paracord bracelet is a long piece of parachute cord woven into a bracelet.

Paracord – or parachute cord – is a highly durable type of nylon rope. Originally used for parachutes during WWII, it is now a common item in military and aeronautical circles. Yup, even NASA use this type of rope in space!

It’s also made its way to hikers and survival enthusiasts, as it is made of a durable, strong and lightweight material and can be used in more ways you can imagine, thanks to its strength and highly versatile nature.

The rope is a so-called ‘kernmantle rope’. Several strands of thinner rope run through an external flexible sheath. This allows the rope to have huge tensile strength, provided by the thinner ropes, while the sheath provides protection from abrasion to the sides. The component parts of the rope can be used separately, for instance to increase the length of your rope, making for an extremely versatile piece of kit.

The most commonly used type of paracord is the 550 cord. This type has a minimum break strength of 550 lbs. (250 kg) and holds seven inner strands. This is the material used for most paracord bracelets as well and will not let you down when you find yourself in a hard spot during a hike.

A paracord bracelet is made up of a long piece of knotted paracord, with a clasp on either end to secure it around the wrist.

For the average outdoorsy person, a paracord is a piece of equipment used mostly in emergencies, or at least only in very specific situations. You wouldn’t expect to need a paracord every time you step out of the house, but you do want it handy and ready to use in case you need it.

Since taking large quantities of paracord with you can seem a bit redundant for most trekkers – especially when going on shorter walks – you should be able to carry it in an easy and convenient way.

That’s why the paracord bracelet was invented.

It is a highly efficient way of carrying a paracord with you. You won’t be bothered by the bracelet in any way while wearing it, but you’ll always have it available for almost immediate use you can unravel the cord whenever you need it.

What can I do with a paracord bracelet?

Apart from being a cool accessory, the paracord bracelet’s main aim is to be turned into paracord. That’s right, in order to use it, you’ll have to unravel the bracelet, something that’s not necessarily irreversible, but at the same time probably not something you’d want to do every day.

That’s why a paracord bracelet is more suitable for the casual trekker, who won’t need paracord for every hike, but wants to keep one with them for emergencies or unexpected situations. Alternatively, if you do go on a longer hike, a paracord bracelet can also be a great back-up to a larger length of paracord you carry around with you whilst hiking.

You’ll have to undo the paracord bracelet by either cutting the paracord near the end, or by undoing a clasp, depending on the paracord bracelet and the way it was knotted. Then, you’ll be able to use the full length of paracord, or cut it into the desired length.

The bracelet itself is usually around 20 cm to 25 cm long, and some can be adjusted to the wearer’s wrist. Most paracord bracelets are made up of about 3 m of paracord, depending on the type of knotting and the size of the bracelet. You can tie the inner strands of the paracord together to create a longer rope if needed.

Make sure to have a look at the instructions that came with your paracord bracelet before trying to unravel it. The correct way to unravel the bracelet depends on how it was knotted and what type of clasp was used. If you cut the paracord in the wrong place, you may end up with pieces of cord that are too short to use.

There are different types of clasps and some paracord bracelets come without a clasp altogether. We would advise to get a paracord bracelet with a clasp. It is much easier and quicker to put on and take off and sturdy clasps prevent the bracelet from unravelling itself when you don’t want it to.


OK, now it’s unravelled. What can I actually do with the paracord?

Once you unravelled the paracord, it has many different uses. Have a look below:


Survival

In case you didn’t plan on staying outdoors overnight, but you find yourself lost and unable to continue for the day, you’ll need to build yourself a shelter. Paracord can help here, tying together branches and covering them in branches or a tarp. It is best to use the inner strands for this type of work, as they are thinner and you’ll have the exterior sheath left for other purposes.

Hunting and fishing

Whether you took plenty of your own food, or planning on hunting, a paracord can be of help in many situations.

In case you need to store food overnight and keep it out of reach from hungry animals, you can use the ‘bear bagging’ technique. Essentially, you use a long piece of paracord to tie your food to the branch of a tree. Tie together pieces of inner cord to extend your rope.

Paracord can also be turned into a great fishing line by undoing one of the inner strands of paracord. The strands are made up of very thin but strong strings, that make for excellent fishing line. Attach a hook and find some bait and you’ll be munching on some fish in no time. No rivers nearby? Use a paracord, rocks and sticks to set up a snare to catch game.


Medical

When you’re out in the wild and someone needs urgent medical attention, it is best to get them back to safety as soon as possible. In cases where you need to act fast, a paracord might help to keep your fellow hiker alive and conscious until you reach civilisation.

If you or a fellow hiker cut themselves and need suturing, paracord can help. Of course, this is no replacement for professional medical care, but it can stop the bleeding and buy you a few hours to get to a hospital. Again, unravelling one of the inner strands would leave you with string that’s thin enough to use for suturing.

You can also make a tourniquet out of paracord. It is not an ideal solution, as the pressure from paracord is likely to crush tissues without adequately stopping the blood flow. It should only be used as a last resort if no other options are available.

Next to the above applications, there are infinitely more. This is the beauty of paracord: it is so adaptable that it is useful for any trekker, whether you are a casual hiker, or a seasoned survival specialist.

Putting the paracord back together

Once you’re done using the paracord, and in case you haven’t removed the inner strands, you can put the bracelet back. It does take some practice to do this, so make sure you try it at home first. In our experience, you need to have unravelled and re-tied the bracelet at least ten times to be comfortable enough to do it under any circumstances. Familiarise yourself with the correct type of knot – dozens of types exist – and you’ll be set to go!

Alternatively, you can simply pack the undone paracord in your bag and redo it after you get home. Some manufacturers offer to put the bracelet back together for you, if you send them the intact paracord and clasps. They may charge a small fee for this service, though.


What to look for in a paracord bracelet

As there are many different types of paracord bracelets, you could be overwhelmed by the options, so have a look at the buying advice below.

For novice hikers, a simple paracord bracelet would suffice, with a comfortable clasp system made of high-quality nylon. We would advise to get a bracelet that can be adjusted in size, so it makes for a snug fit around the wrist, without being uncomfortable.

Some manufacturers will offer different sizes, eliminating the need for an adjustable clasp. In any case, you should make sure it is tight enough, so it won’t fall off while you’re climbing over a fallen tree, or swimming in a river.

Do make sure the quality of materials is high-grade and look for bracelets made of 550 cord, as described above. After all, you may need to use the paracord to secure your tent or pull someone out of quicksand, in which case strength is paramount. Always buy from a reputable retailer and don’t hesitate to ask them about the sourcing of their products. It’s about you and your fellow hikers’ safety, so it’s important to take care when selecting a paracord bracelet.

For advanced trekkers, more intricate paracord bracelets are available. These bracelets have additional uses, which could come in handy, especially on multi-day treks. These bracelets can include fire-starters, a camping knife, zip-ties, a tinder wick, and other accessories. As these are all tied to the paracord bracelet, you’ll need more time to unravel the bracelet, should you need to use the paracord. In addition, you may end up with a number of loose accessories that are quite fiddly to transport once they’re no longer attached to the bracelet.

Keep in mind, as with most trekking gear it’s best to always err on the side of simplicity. It’s better to get a high-quality, simple paracord bracelet, than to get one with dozens of extra features that will only get in the way of the paracord’s primary function, which is to be a strong and flexible rope.

Have a look at the paracord bracelets we have on offer here. Different bracelet lengths and clasps are available in a multitude of colours.

So which paracord bracelet should I buy?

To help you choose, we’ve selected five bracelets that we think are the best on the market today.

Genoese Paracord Survival Bracelet
Genoese Paracord Survival Bracelet

The Genoese Paracord Survival Bracelet is one of the best all-round paracord bracelet. It is made from military grade 550 cord with a contour buckle and is custom made to the right wrist size. Sold in sets of five bracelets.

SMD 550 Red

SMD 550 Red s simple, yet efficient. It is the best value one in our overview. That doesn’t mean it’s low quality, however, as it is made from high grade 550 cord.

Urban Carry Strap
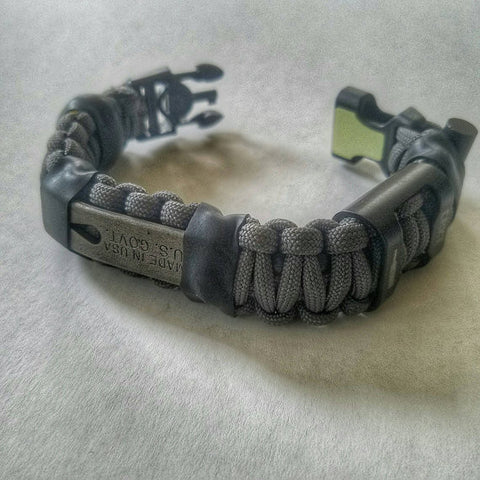
Urban Carry Strap

The Urban Carry Strap is undoubtedly one of the most versatile paracord bracelets on the market today and comes with many accessories. It has a firestarter, a Kevlar saw, zipties, a tinder wick and much more. It is pricier than most bracelets, but you’ll get a lot of value from this excellent bracelet.

Pulsar Army

Pulsar Army Paracord Bracelet

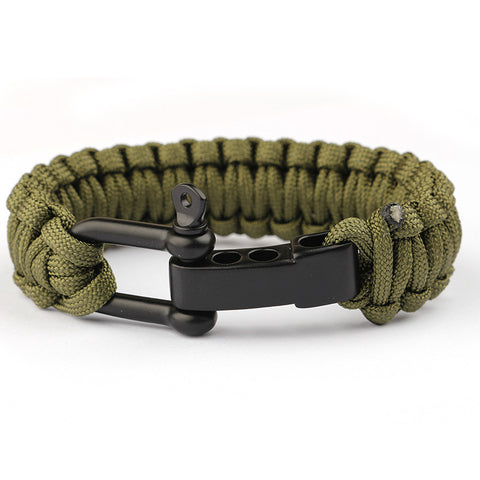
As the paracord bracelet will spend most of its time on your wrist, it needs to be comfortable and should always stay on until you want to take it off. This is where the clasp comes into play. The Pulsar Army‘s metal clasp is an incredibly strong shackle and can be adjusted in size in a few seconds.

Grumpy Goose Rainbow

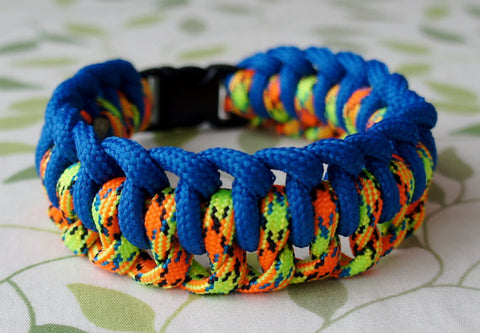
GRUMPY GOOSE RAINBOW BRAIDED PARACORD BRACELET

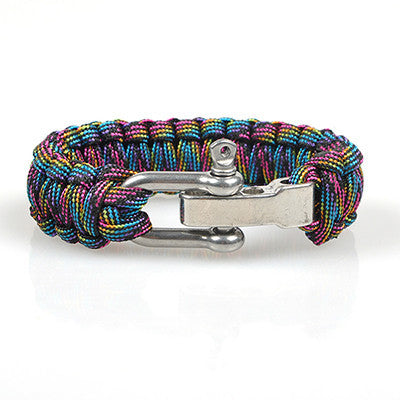
If you’re looking for a strong, but also fun paracord bracelet, have a look at the Grumpy Goose Rainbow. This bracelet has a strong metal shackle and comes in all colours of the rainbow, making for an exciting and fresh look.


source https://www.bladespro.co.uk/blogs/news/top-5-paracord-bracelets-of-2017

Top Tactical Vests for 2017

A tactical vest can be a critical piece of kit for a soldier, providing one of the first lines of defence for vital organs. In a modern day army, tactical vests are combined with plate carriers, as well as with load bearing vests. Vests are now made with modern materials, which makes them both long lasting, versatile and user friendly. You’d be hard pushed to find a modern military or security force that doesn’t utilise and equip their forces with a tactical vest, and for very good reason.

A soldier on the ground would need a tactical vest in order to carry body armour such as SAPI plates, and steel plates. These protective plates are critical for protecting vital organs from rounds and shrapnel, often the plates are enough to stop a potential lethal round from entering the body. Additionally, the vest will stop the protective plates from moving around, ensuring consistent protection is in place, keeping the soldier protected as he or she performs duties in potentially hostile conditions.

A tactical vest will allow the spread loading of magazines and other tools on the vest, which is useful for the wearer to distribute weight evenly and keep vital tools within easy reach. A modern vest is made with ripstop nylon, and can come in a huge array of camo patterns. A typical example of camouflage include Kryptek patterns, as well as urban grey patters, which are ideal for city deployments, allowing for the wearer to blend in well with the typical city colours. The Krytptek style of camouflage are popular as they work with vegetation as well as other environments, such as desert.

The Vietnam war saw the rise of load bearing vests in combat situations. The LBVs prove to be popular as they were cooler than flak jackets, but also provided a good deal of practical applications. An experienced soldier would often prefer to only carry what was absolutely necessary, the intense heat and conditions made carrying excessive weight difficult. Moving on a few years to the OIF and OEF combat theatres, and we again have soldiers working in excessively hot locations, but are required to wear thick uncomfortable body armour. LBVs are again a popular choice, however, due to the risk of IEDs, soldiers were required to wear full vests in order to maximise protection.

A modern tactical vest will be made of modern synthetic materials in order to handle the harsh conditions to which they are exposed to. Nylon material, as well as over engineering of seams and joins ensures the products remain functional throughout a lifetime of use, this ensures critical equipment failure is less likely to be an issue.
Any accessories or pouches that an operator chooses to wear are equally made of hard wearing materials, providing a reliable, sturdy and dependable tool which can take the abuse of harsh combat situations.


Modern Tactical Vests Features

  • Quick release mechanisms.
  • Camouflaged.
  • Multiple pouches.
  • Molle webbing.
  • Plate carrier accessibility. 
  • Hydration options.


Side plates are an essential component for protecting against directional fire coming in from the side. A tactical vest needs to be modular in design, this allows for the operator to customise the pouch placements and types to meet their specific requirements. For example, one operator may wish to have all pouches at the front of the vest, while others may prefer to stagger their placement close to their non-dominant shooting hand.


Non Military Applications

For anyone that’s not involved in military or security forces, a tactical vest can still be a welcome addition for a wide range of activities. For example, many outdoor activities benefit from the extra, readily available storage offered by a vest.


Fishing and Hunting

Anyone that’s fished or hunted knows that having easy access to a range of specialised tools can make not only make the difference when landing fish, but it can also just make life that much easier when preparing a rod or when dealing with bait. This is where a tactical vest comes into its own, with a range of configurable pockets and pouches available within easy reach, it’ll make you think about how you ever managed without one previously.


Hiking and Camping

Much like the previously scenario, having access to conveniently accessible pockets and pouches while hiking or camping is a core benefit of a tactical vest. Additionally, a vest can be surprising warming or indeed cooling, depending on the additional layers worn. Being comfortable while pursing outdoor activities is closely linked to the enjoyment factor, at least for this author.


War Games and Airsoft Tactical Vest

If you have ever been involved in an intense and hectic Airsoft battle, you’ll know the value of having additional pockets, pouches and compartments. For this reason alone, it’s worth planning and ahead and equipping yourself with an Airsoft Tactical Vest. The vests are worn by militaries security forces all over the world, and for good reason. Most vests come with several pouches and slings as standard, which means there’s ample room for carrying your Airsoft arms, BB’s and much more besides. Some vests come with hydration systems and even foam plates, which help to protect you for BBs shot with too much FPS. So, if you want to protect yourself and have the ability to carry multiple accessories, then a Airsoft vest is wise investment.


What is Molle Webbing?

MOLLE is actually an acronym, and stands for Modular Lightweight Load-carrying Equipment. It is used to describe and define the new generations of load-bearing equipment and backpacks utilised by many of the NATO armed forces, especially the United Stated Armed forces and British Armed forces. The system is designed to be modular, which is accomplished by the use of the PALS webbing. Rows of heavy duty nylon are stitched into the vest which allows for attachment of various MOLLE compatible pouches and accessories. This method has been widely accepted and is now the de-facto standard for modular tactical gear. The MOLLE system has replaced the ALICE system used in many of the earliest tactical vests.

Quick Release Mechanism

A quick release mechanism was originally designed to allow for the vest to be removed quickly in case of a soldier requiring triage and medical attention. The quick release mechanisms available in commercial vests tend to lean towards convenience rather than life and death situations.


What to Look for in a Tactical Vest

As with many consumer products, there is often a certain amount of sales talk and marketing mumbo jumbo that goes into creating a product descriptions. This is not unexpected, the purpose of making a products is to have someone buy it, so why not maximise the chances of a purchase with some creative sales writing. Fortunately for us, it’s relatively straightforward to read between the lines and understand the features offered by a tactical vest and then understand whether or not they will suit our purpose.

Your first priority should be establishing a budget and sticking to it. Your budget should include the vest itself and any additional accessories you might want, for example, extra pouches or a hydration system.

A budget friendly perfectly respectable vest will start at around £40 and will go all the way up to £200 for a top of the line model. If you’re not sure what you want, I would suggest getting a basic model, you can always upgrade at a later stage once you have a better idea of the features and style that suits your requirements.


ACU Molle Tactical Vest

ACE Molle Tactical Vest
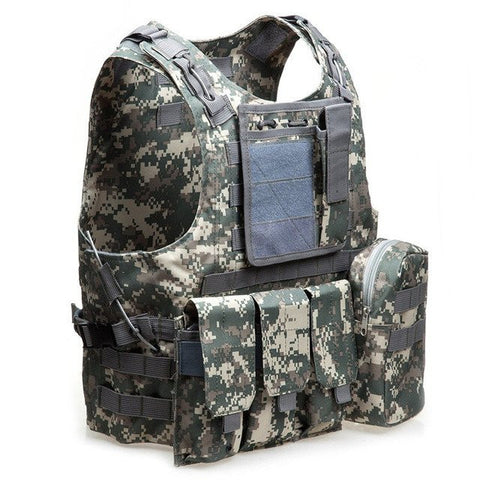
As you might expect from ACU, this vest has been wholly embraced by the tactical community. The chest rig is great value for the price.
This piece is an ideal purchase for anyone that does not require the addition of body armour. The vest is brilliant for training, hiking or competitions. There’s ample storage space and capacity for everything you might need to carry in your vest.
By design this vest is not modular, any pouches or compartments are sewn in into the vest. However, the setup is still incredibly practical and has plenty of scope to add additional pieces of kit if you desire.


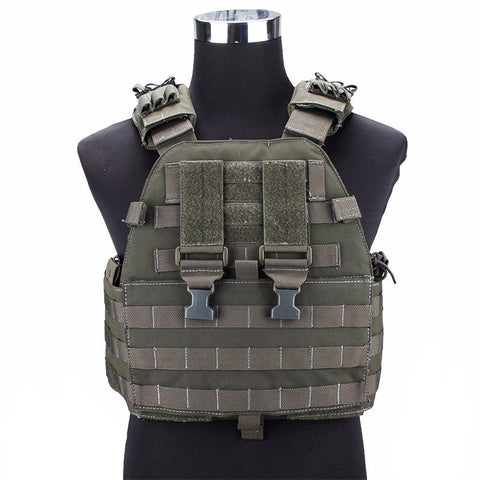
Molle Khaki Camouflage Tactical Vest

MOLLE KHAKI CAMOUFLAGE TACTICAL VEST
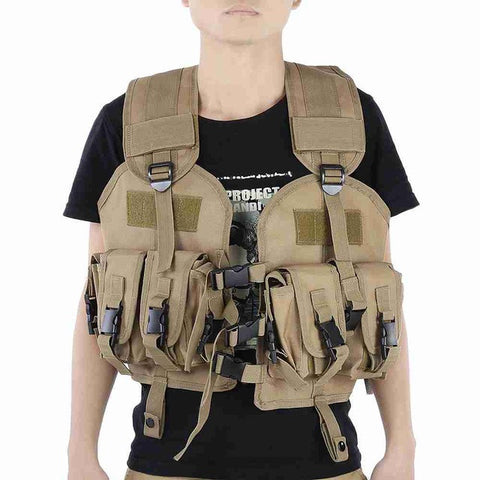
This vest has a strong reputations in the security force communities, and it’s due to the strength of its products, such as this one, that make it easy to understand why. The Molle Khaki vest is very well made and is testament to the manufacturers commitments to making products that will last. The seams are well made and provide you with the confidence in its ability to get through rough treatment in once piece.

Additionally, the pouches and hydration system give you plenty of options for storing tools and accessories securely, the three main pouches can even be removed for easy access.
The manufacturers have considered your comfort throughout the design process, air flow is kept at a maximum and movement of the operator has been kept as a priority. At no time when wearing the vest did I feel that my movement where restricted, nor did I feel that the vest was moving around unnecessarily.

If you want a vest that meets your accessory needs but is also well made, then we can thoroughly recommend this vest as a great option.


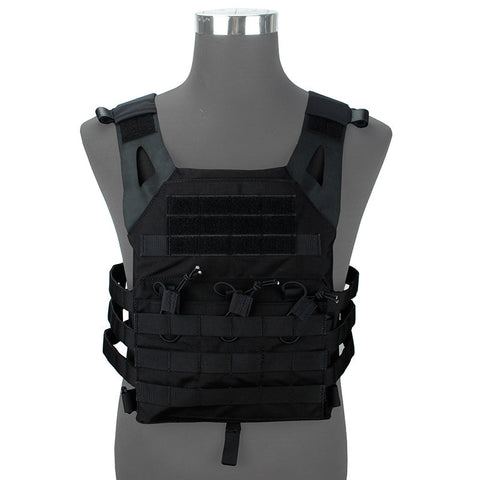
TMC Plate Carrier Tactical Vest

TMC PLATE CARRIER TACTICAL VEST

This rig is simply put one of the most comfortable vests we’ve ever had the pleasure of wearing. If you’ve ever had the opportunity to wear armour, you’ll know what I’m talking about when I say that comfort is a cornerstone of a good plate carrying vest. For this very reason, this vest gets a very big thumbs up from us. This TMC Plate Carrier Tactical Vest is made from 500D nylon, which is very high quality for the price range. You might be able to find higher quality nylon vests out there, but they will likely cost three or four times as much as this gem. The 500D weight feels extremely durable, and also means that this vest is significantly lighter than a comparable vest made from 1000D nylon. This vest is designed to fit a range of plates, which gives you plenty of options for your particular requirements.
Stability of this vest is top notch, it fits snugly, comfortably and did not move around at all when we were using it.

The quick release mechanism of the vest means you can completely remove the vest in a matter of seconds.

In summary, load the best up with plates, a hydration system and you’re all set and ready for almost anything. The durability and build quality of this vest are top of the range. We have absolutely no concerns about this vest and we’re positive it would put up with harshest of conditions unscathed.


EG Sports Assault Plate Carrier

EG SPORTS ASSAULT PLATE CARRIER TACTICAL VEST
This system is used by law enforcement specialists from around the worlds. The designers have worked with spec-ops teams directly to develop a tactical vest which meets all of their strict requirements for an effective combat vest.

The vest I made from high quality 500D nylon, which is made even more impressive when we consider that the vest material has been chosen in order to minimise its infrared signature.

The vest is kept comfortable and appropriate for all weather conditions due to its clever 3d spacer mesh lining.

There’s plenty of options or kitting out the vest with additional pockets and pouches and the Molle system is cleverly positioned and well made.

Overall, it’s a brilliant system, one which deserves to well respected and put to good use.


source https://www.bladespro.co.uk/blogs/news/top-tactical-vests-uk-for-2017

Monday, 26 June 2017

The Best Compound Bows UK 2017

Bow technology has come a long way over the last few decades, nowadays compound bows are the most fastest, powerful and accurate bows available to buy. So, what benefits do these new-fangled bows have over traditional recurve bows of old, and how do you use one? What is the best compound bow for sale in the UK?

Almost ten years ago, I took the time out of my busy schedule to learn the art of archery. To begin with, I hadn’t shot a bow since I was in school, which is more than a two decades ago, but now, a few years of practise later, I can hit a 5 cm circle multiple times at 80 metres or more. This article will be everything I’ve learnt over the years, as well as serving as an introduction to archery and the modern technology used, which I hope will help anyone not familiar with the topic. Additionally, I’ll cover some of my personal bow recommendations. Apologies to anyone that’s intimately familiar with compound bows, at times I may simplify some topics, this is only to improve readability and to keep this article from spiralling into an epic saga, rather than a short enjoyable read.

There’s no denying that traditional bows are often beautiful pieces of art and are undeniably a lot of fun to use and shoot. But they are, simply put, inferior to compound bows made with modern materials and modern engineering know how.


Low Budget Option

KaiMei C50 Compound Bow 50 lbs Draw Weight

KaiMei C50 Compound Bow

The KaiMei C50 Compound Bow is a great choice for shooters who want to try a compound bow without spending a lot of money. This bow is high quality and durable, making it the perfect choice for developing your archery skills. Don’t be fooled by the price. From our experience using the bow, it gives you more than you might expect for this price range. The materials used are top notch, and the parts work together seamlessly, making it a joy to use. Our only criticism is that you’d really need to invest in a decent sight to make best use of the bow, so may wish to factor this into your buying decision. This bow is a bargain and while it may not be as feature rich as some more expensive models, it’s more than capable of providing an excellent compound bow experience. If your budget is limited, don’t hesitate in buying this bow.

What we liked:

  • The quality of the materials.
  • The price.

What we didn’t like:

  • The sight.

Mid Price Option

TopArchery Aluminium Alloy Compound Bow with 35-70 lbs Draw Weight

TopArchery Aluminium Alloy Compound Bow

The TopArchery Aluminium Alloy Compound Bow is one of the most versatile and best-selling compound bows that exist today. The bow is full adjustable, meaning you can tailor it to suit your requirements with very little effort. This flexibility means the bow is a great choice for beginners as well as experienced shooters. Both draw weight and draw length can be adjusted, so it suits both small and large shooters alike. It’ll suit both male and female shooters as well as the young and old.

What we liked:

  • It’s versatile.
  • It suits a wide range of shooters.

What we didn’t like:

  • Very advanced shooters may want a better sight.

High End Option

TopArchery D690 Compound Bow 30-60lbs Draw Weight with Spincast

TopArchery D690 Compound Bow 30-60lbs Draw Weight with Spincast

The TopArchery D690 Compound Bow is a bow that will last a lifetime of use, it’s well made and is a great fit for teens to adults. It’s also quite affordable and provides a lot of kit for the money. 
The bows settings are adjustable for draw length and weight, do you can tailor the bow to meet your shooting needs. 
It’s probably the ‘last bow you will ever need’.

What we liked:

  • Everything.
  • It’s light, well made and adjustable.

What we didn’t like:

  • Nothing.

Just What is a Compound Bow Anyhow

Every bow, whether new or old, uses the mechanical advantage of leverage in order to store energy in the limbs of the bow. This is why an arrow released from a bow travels far faster than you could possibly throw the same arrow.

A traditional bow will store this energy directly. This means the further you draw the bow, the harder it is to pull and the more energy is available to be transferred into the arrow when released. This equates directly into the more effort you’re expanding into drawing the bow, the further and faster the arrow will be. The downside of this is that when you’ve fully drawn a bow, you have to be able to fully support and hold the entirety of the draw weight. Basically, if your bow requires 40kg to draw, you’re left holding 40kg in your hands, which can be rather difficult and gets tiring quickly. It’s perhaps not surprising that long bow men of olden times would train from childhood, they would need a lifetime of muscle development to be an effective archer.

The clever engineering of a compound bow means the big wheels on the limbs (cams) are designed to do something called ‘let off’ at full draw. With most modern bows, this let off is between 60 – 80 percent of the regular draw weight. As an example, my bow has a 70% let off, which means that when fully drawn to its 40 kg draw weight, I’m left having to hold and support 12kg. Due to the reduced draw weight, I can spend more time aiming at the target, I can practice for longer without become tired, and I’m less likely to develop a massively overdeveloped shoulder. Less weight means I’m also much steadier, which of course increases accuracy further.

Through intelligent changes to the profiles of the cams, bow engineers (I’m sure they exist) can dictate how much of bow’s power is applied to the arrow at specific points in the string’s travel. A compound bow is faster than a regular bow as it can apply full force and power to the arrow almost as soon as the string is released, then hold the power applied to arrow until it finally leaves the string.

A practical example of this would the fastest production bow ever made. It has a stunning IBO speed of 370 feet per second, which is almost twice as fast as what a traditional bow can manage.

Speed is important when it comes to accuracy. The faster an arrow travels, the flatter the trajectory of the arrow is. By shooting a flat arc, the arrow is able to stay pointed at the target through more of its range.


Does Speed Really Matter?

Given an arrow with equal weight, mass and flight characteristics, a fast arrow is more powerful compared to a slower moving arrow. Not only does this mean the arrow hits its target with more force, but it also means the arrow will fly with a flatter arc resulting in a more accurate flight journey over distances. This is especially important when you understand that one of the fundamental challenges with archery is estimating the range to a target in order to calculate the arc of the arrows flight. An arrow on a flatter arc allows for more leeway in case of a miscalculation.

If you consider my bow, for example, if I think my target is 20 metres away, and aim with that parameter, the trajectory is forgiving enough so that it’ll result in a fairly accurate hit at anywhere between 10 and 30 metres.

This is even more important when more complicated shooting conditions are introduced, such as shooting down or uphill. Trust me, once you start calculating shooting angles and trajectories in your hobbies, the world around you starts to look increasingly hilly. The ease in dealing with these complications is one of the big advantages imparted by a compound bow.

It might come as a surprise, but distance isn’t really a major advantage for modern bows. Wind, elevation and a whole host of other variables dictate that the overwhelming majority of archers will shoot at targets within 90 metres. Most decently made bows are capable of delivering the goods within that distance.


Compound Bows: The Bits and Pieces

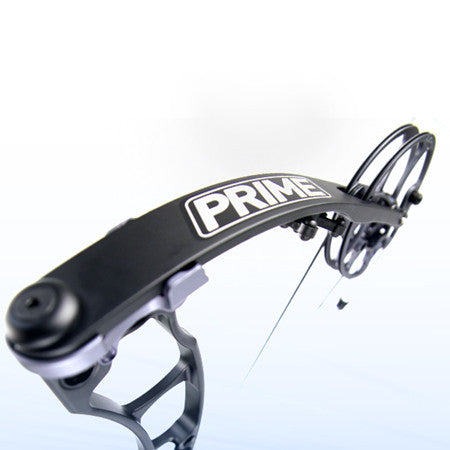
Limbs: The flexible limbs that do all the heavy work storing and releasing energy.

Compound Bow Limbs
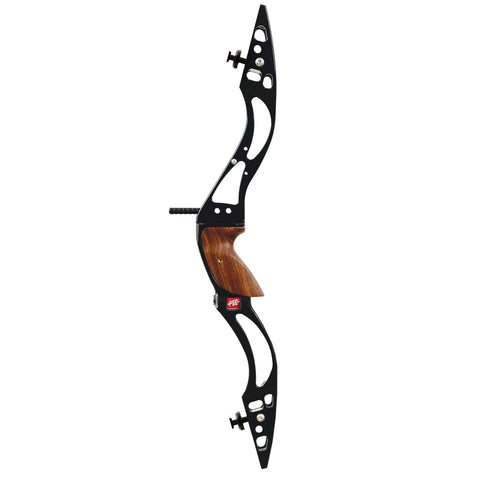
Riser: The chassis of the bow. Holds most of the other parts together, this is where the limbs attach and any number of accessories might be attached to. The riser must strong and shouldn’t flex.

compound bow riser

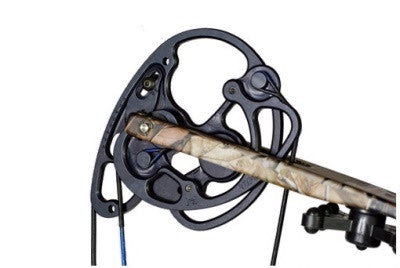
Cams: You can have one cam on your bow, two cams or hybrid cams. A single cam configuration is very simple, easy to use and pull, but is not as fast as other configurations. Two cams are the hardest to pull, more difficult to configure, but are also the fastest configurations available. Hybrid cams try to give you the best of both worlds.

 compound bow cam


Bowstrings: You draw the string, which rotates the cams, flexes the bow limbs, and when you’re ready to release it, it will launch the arrow. A modern bow string has very high tensile strength and won’t stretch and hopefully won’t break either.


Cables: These fix the limbs to the cams, allowing for them to pull on each other.


Cable Slide: This keeps the cables away from the path your arrow will take.


Brace Height: This is basically the distance between the grip and string at rest. If this is short, the longer the time arrow is contact with the string for, and the more power and speed that is imparted into the arrow. The downside is that the longer the time the arrow is in contact with the string for, the higher the likelihood that movement from the archer will be transferred to the arrow. The shorter brace means its faster, but it’s also less forgiving of the archers errors.


Compound Bow Accessories Must Haves

Most bows don’t come with many accessories, as they are very subjective, and what works for one archer might not be appropriate for another. We all like different things. Accessory choice will also be dictated by shooting style, conditions and what the archer is trying to accomplish.

Arrow Rest: The names pretty much says it all, this is what the arrow rests on when the bow is drawn. The difference between the types of arrow rest are often subtle, but they are all trying to do the same thing, which is not adversely affecting the arrow fletching.

D-Loop: This is a small piece of cord which is attached to the string. The arrow is knocked between where it attaches to the string.

Peep: A small piece of plastic or metal, which acts as the near sight, allowing you to aim correctly with the bows sights.

Release: Unlike many traditional bows, a compound bow is not released with your fingers. Instead, a mechanical release is used. This gadget is firmly attached to your wrist, which allows for the weight of the draw to be directly transferred to your arm. Additionally, releasing an arrow is much cleaner compared to using your fingers, increasing accuracy. Releases come in two main variances, two sided pincers or single hooks. I prefer the single hook, it’s less fiddly and much less hassle, at least for me.

Sight: The sight allows you to aim at targets. First you need to estimate the distance to a target, next you’ll align the target with the appropriate pin on your site, this should then allow you to fire at the target with the flight arc already calculated for you. Brilliant. Due to the relatively flat arc of a compound bow, the sites can be quite forgiving in case of a miscalculation of distance to a target.

Stabilisers: As the name suggests, the job of the stabiliser is to help stabilise the bow in your hand. Firstly by helping with the balance of the bow. Secondly by cutting down on the vibrations imparted by firing an arrow. The setup of stabilisers can get quite complex, with stabilisers pointing in all sorts of directions to help balance the bow, what you decide to go with comes down to personal preference.

Quiver: The quiver can be mounted on the side of your bow, and in case you didn’t know, the quiver holds your arrows. It’s still possible to use hip or back quiver if that’s your preference, in fact, if you’re only shooting targets then a hip quiver is probably your best bet. The bow mounted quiver is better suited for an archer who will be moving around allot, as it’s less likely to hinder movement and get in the way of things.

There are of course more parts and accessories for a compound, but the list cover the main ones you’d need to know about.

A field ready bow is a compound bow that comes with all the accessories you’re likely needing, meaning you can jump straight into shooting without any further consideration. Over time, you may wish to purchase additional accessories or upgrade what you already have.


Which Bow Should I Buy?

There are more than a few bows out there, and as you might expect, their marketing teams have worked hard on promoting the merits of their bows, often using jargon and marketing terms in an attempt to bamboozle the buyer. Thankfully, deciphering the hype an finding a decent serviceable bow is straight forward enough.

Your first priority should be giving yourself a total budget and sticking to it. Your budget should encompass your bow, your accessories and arrows. Expect to pay in the region of £80 for a few dozen arrows by themselves, but these should last a long time and give you plenty of use.

A respectable, well made and field ready bow with fitted accessories will start at around £300. You can of course spend a lot more than this, which is why it’s important to set a budget and stick with it. It’s very easy to be tempted by a top of the range bow costing in excess of £1000, however, as a beginner, it’s very unlikely you’ll need to spend as much as this. If later down the line you want to upgrade, you’ll have a better idea of what you want from your bow and can better pick the compound bow and accessories that meet your needs.

Next you’ll want to decide on what weight you want your bow to be, don’t go overboard here. There’s no need to be macho, a 50lb pound bow is often more than enough for most people.


Shooting Your New Bow

One of the first things you’ll want to do with your new compound bow is shoot it, this works to remove any stretch that might be present in the bow string. I would suggest getting to a range and shooting at least 150 arrows down range. Once this has been done you can proceed with having your peep installed and aligning your sight.


Each sight works in a slightly different way, but here’s some general tips and tricks for setting up your bows sights. Firstly, approximate the sights 20 yard pin, once set, shoot at a 20 yard range target with six arrows, adjusting the sight to compensate for the pattern the arrows fell in. For example, if your arrows are high and right, adjust the pin upwards and to the right. Once the 20 yard pin is set well and your arrows are grouping nicely on your target, start shooting down the range through your other pins, adjusting the settings as before. You should expect to devote several range visits to zeroing in your sights.

When you’re setting up your sights, you’ll want to ensure you’re shooting with good form and following best practises. A couple of lessons at this point will certainly help, however, the main points are to stand with your feet aligned and perpendicular to the target. Your feet should be shoulder width apart. Your bow arm should not be fully extended, instead keep some flex in it, additionally, don’t tightly grip the bow. When you draw the bow, keep your elbow high and your hand flat and relaxed. Try to find constant anchor points on your face for the string and trigger the string release smoothly and consistently. To maximise accuracy, hold the bow as still as you can as the arrow travels to the target and impacts. This follow through is the key to accuracy.

Once your bow is well sighted and you’re able to consistently hit targets, I highly suggest giving a 3D shooting range a shot. A 3D range has obstacles, elevation and different types of targets to the mix, it’s a fun way to add a whole new level of challenge to the sport. Estimating the distance and elevation of a target complicates shooting considerably, so be prepared to take some time to work things out and get used to a whole new style of shooting. You’ll more than likely lose a few arrows the first few times you shoot on a 3D range. To make things easier you can invest in a range finder which simplifies the experience, it’ll also help you to judge distances for yourself so that you can eventually work everything out in your head.


Tricks of the Trade

If you want to maximise your archery strength then I suggest devoting some time to a weightlifting programme to condition your muscles and make drawing the bow easier. One of the best exercise for increasing archery strength is by performing the aptly named ‘Archer Rows’. I would always suggest having a gym instructor help you to perform any new exercise with the correct form, but if you don’t have access to one, or you want to work it out for yourself, then try the following. Using a bench and a dumbbell, brace one hand against the bench while you lay against it, ensure your feet are shoulder width apart and keep your abdomen and core tight. Once you’re in position pull the dumbbell off the floor and up to your armpit, keeping your body steady as you do so. As you might have already guessed, this movement is similar to drawing the bow string. It’s crucial to repeat this exercise for both arms, which will help avoid any muscle imbalances. Keep the rep range low and the weight as heavy as you can manage, this will help build strength and endurance.

As I mentioned earlier, a range finder is a great tool for learning and estimating distances as you’re starting out. I would suggest looking for a range finder which also compensates for elevation, which simplifies everything. I personally use a Leupold RX1200i TBR, which serves all my needs.

Safe storage of a bow is as important as safe for storage for any other dangerous item.

Never dry fire your bow. Without an arrow to resist the bow string, the forces involved can cause the string to catastrophically fail and explode. This can serious injury to yourself or others. You should treat your bow as a dangerous item and don’t let someone inexperienced handle your bow without supervision.

You may find you need to align your sites every so often, or if you change the type of arrow you’re firing.


source https://www.bladespro.co.uk/blogs/news/the-best-compound-bows-uk-2017

Thursday, 22 June 2017

Types of Japanese Swords

Japanese sword making goes beyond the traditional Katana, in fact, there are several remarkable swords Japan is known for, all of which have their own well deserved reputations.

Tachi Sword

Tachi Sword

The Japanese Tachi sword is in some respects similar to the Katana, however, it can be distinguished by its more pronounced curve and slightly longer blade. The Tachi was primarily used by warriors on horseback, where the extra length and curve to the blade made it particularly suited to cutting down any enemy foot soldiers on foot.
The sword is the predecessor to the Katana, as the preferred weapon the of Japan’s warrior class, and it evolved over the years into the later designs. The two are more easily differentiated from each other by the fittings on the blade and how they were worn.

Katana Sword

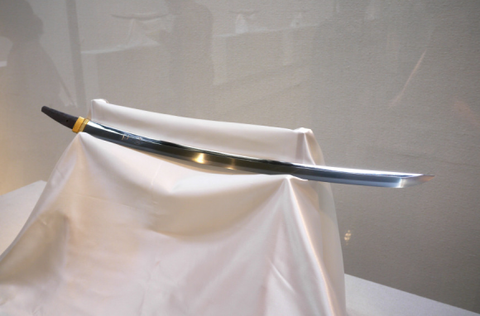
Katana

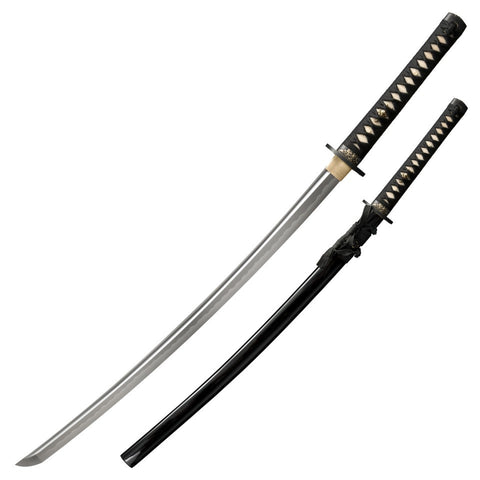
The legendary Katana is well known type of Japanese sword, which is often solely referred to by many as a ‘Samurai Sword’. The Katana has several characteristics which make it easily recognisable. The single edged blade is curved, slender and averages between 60cm – 80cm long. Most Katana will have a square or round hand guard and the handle will be long enough to accommodate two hands. The blade has long been associated the Samurai class of feudal Japan, it’s instantly recognisable for many due to its appearance in pop culture and it’s synonymous with Japanese swords.
The Katana began its life around 1392-1573, during the Muromachi period. It’s thought the sword came to fruition due to changes to the battlefield environment, which required warriors to be more responsive and faster. The Katana was unique as it was traditionally worn with the edge facing upwards, allowing the wearer to draw the sword and strike there opponent in a single stroke.

Wakizashi Sword

Wakizashi Sword

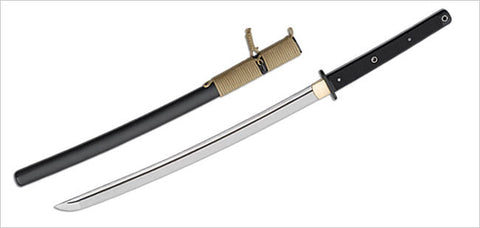
A Wakizashi sword is a another traditional Japanese sword with a shorter blade compared to the Katana, the average Wakizashi is between 30 and 60 centimetres. The sword is similar in some respects to the Katana, and is shorter than both the Katana and the Kodachi. Traditionally, the Wakizashi would be worn with the Katana by Samurai warriors. This pairing of swords is called the daisho, or little big. The Katana in this pairing would be called the sword, long sword or killing sword, while the Wakizashi would be called the companion sword. 

The Wakizashi could be used as a backup weapon, or in some circumstances could be wielded in the warriors off-hand, if the Samurai was skilled enough to use two swords at the same time. On occasions the sword may also be used to commit Seppuku, or ritual suicide, which lead to the title ‘Honor Blade’.
When entering a building or residence, the Samurai would often be required to leave their Katana at the entrance. However, the Wakizashi could be worn at all times without causing offence. This made the sword something like a side arm, as it was inconspicuous and could be taken everywhere. It was also especially well-suited to fighting in confined spaces, seeing as the sword is shorter than a Katana. Some Samurai would even sleep with the sword under there pillow, or next to the bed, in order to be instantly accessible.

Odachi Sword

Odachi

The Odachi is a very large two handed Japenese sword, the word Odachi roughly translated to ‘field sword’.
Odachi look in many ways similar to a Tachi, however, they are significantly larger and longer. It is thought that the Odachi was carried by foot soldiers and where used primarily against mounted cavalry, the extra reach provided by the Odachi could allow a soldier to engage a mounted warrior directly. Odachi would generally only be used in open battlefields, as their large size made engagement in constricted environments unpractical.

Shin Gunto Sword

Shin Gunto Sword

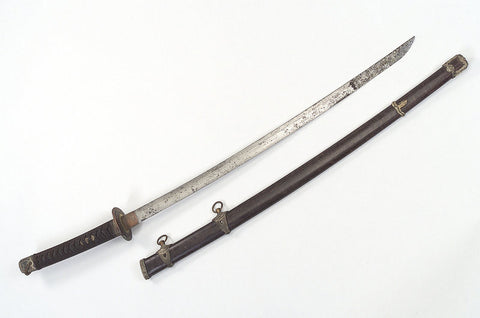
The Shin Gunto Sword was created and designed for use by Japanese officers during world war two.


source https://www.bladespro.co.uk/blogs/news/types-of-japanese-swords

Monday, 19 June 2017

Norimitsu Odachi: Who on Earth Could Have Wielded Such a Sword?

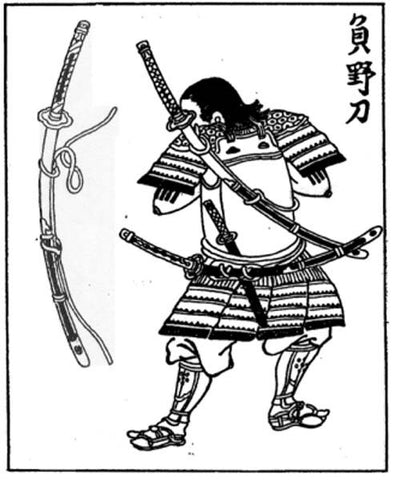
The Norimitsu Odachi is a very large sword originating from Japan. The sword is so large, in fact, that legend says it was wielded by a giant. Ignoring the myth for the moment, apart from some basic details, such as the sword was forged in the 15th century, it measures 3.77 metres (12.37 ft), and that it weighs an impressive 14.5kg, the rest of the swords history is largely unknown.

The History of the Odachi

The Japanese are no stranger to forging swords, their sword making technology and ability are renowned. Many types of sword have been produced over the centuries by Japanese sword smiths, but without a doubt the most famous sword originating from Japan and the one most people are familiar with is the Katana, due in part to its association with the Samurai. Regardless, there are a range of less well known swords produced in Japan over the years, including the Odachi.

The Odachi, which roughly translates as ‘great / large sword’, and is also sometimes referred to as Nodachi, which translates as ‘field sword’, is a long bladed sword from Japan. Like the Katana, the blade of the Odachi is curved, and is commonly between 90 – 100 cm in length. Some Odachi where even recorded as having blades which exceeded two metres in length.

The Odachi was a popular choice on the battlefield and was the weapon of choice during the Nanboku-cho period, which lasted for most of the 14th century AD. During this time, most of the Odachi produced where over one meter long. This sword, however, saw its popularity quickly wane, falling out of favour after a short amount of time. The main reason was likely due to the practicalities of wielding such a large sword effectively and changing battlefield tactics. Still, the Odachi continued to be used in battles right up the 1600’s, following the Osaka Natsu no Jin, during which the Toyotomi clan was annihilated by the Tokugawa Shogunate.

The Odachi may have been used a number of ways on the battlefield. The most likely and common use was that they were used by common foot soldiers . This is backed up by literary works such as he Heike Monogatari and the Taiheiki. A foot soldier provided with a Odachi may have worn the sword slung across his back, rather than at his side as with the Katana, mostly due to its remarkable length. This, however, had a significant drawback, making it near impossible for the wielder to draw the blade quickly.

Odachi

Alternatively, it’s also possible that the Odachi may have been carried by hand. There are records indicating that during the Muromachi period, it was widely practised for a warrior tasked with wielding an Odachi to have a retainer who would assist him to draw the weapon. There is also evidence suggesting that the Odachi may have been wielded by mounted warriors, the extra reach offered by the Odachi would have obvious benefits for those on horseback.

It has also been suggested that, as the Odachi was such an unwieldy weapon, it was not actually used in combat. Instead, it may have been used as an armies standard, in much the same way as flags where used in the western world during a battle. Additionally, the Odachi may have used exclusively as a ceremonial piece and used ritualistically rather than in battle. During the Edo period, the Odachi was often used in ceremonies. Furthermore, Odachis were sometimes used as offerings to the gods, being placed at Shinto shrines. Lastly, the Odachi may have been used by swordsmiths to demonstrate their expertise, it was considered a difficult sword to forge, requiring considerable skill.

Norimitsu Odachi: Ornament or Practical Weapon?


Legend states that the Norimitsu Odachi was a practical weapon, and due to its size, must have been wielded by a giant. Unfortunately, there is no evidence to support this claim. A far simpler and more likely explanation for this impressive sword is that it was used for purely non-combative purposes.
Whoever created the lengthy blade would no doubt have been a highly skilled swordsmith. This might suggest that the Norimitsu Odachi was created as a showcase piece, allowing the swordsmith to demonstrate their significant skills. In addition, the sword may have been commissioned by a wealthy individual to show off their wealth and significance.


source https://www.bladespro.co.uk/blogs/news/norimitsu-odachi-a-sword-wielded-by-a-giant

Saturday, 17 June 2017

10 Legendary Swords from the Ancient World

Not only are swords weapons, but they also very symbolic, and deeply ingrained in the human psyche. Over the centuries they have been used as symbols of power, used in countless types of ceremonies, as offerings, for coronations, as well as being used for trade. Over time, a number of swords have garnered their own legends and myths, linking the swords to famous events and people. Sometimes the swords themselves are the topic of legendary tales. In this article we’ll look at ten incredible swords from mankind’s history.

Joyeuse: The Legendary Sword of Charlemagne

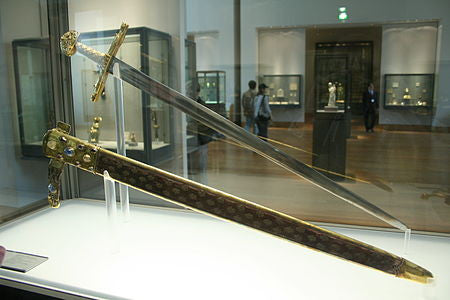
Joyeuse
The sword of Joyeuse, which is now housed in Frances Louvre Museum, is quite possibly one of the most iconic and famous swords in all of history. There are multiple historical records linking the sword to Charlemagne the Great, who reigned over 1200 years ago. The sword itself has been used in uncountable coronation ceremonies over the centuries, and is said have magical powers as well as having a rich legend and history.

The Seven-Branched Sword: Japanese Ceremonial Sword

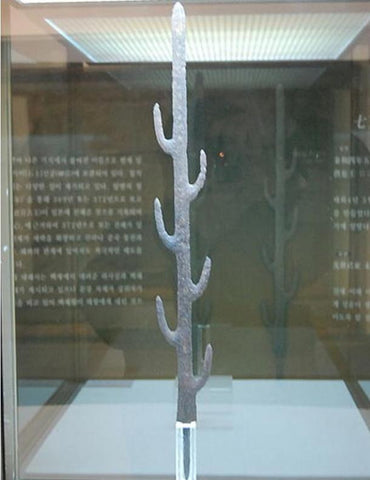
Seven-Branched Sword
Nestled in the foothills of Tenri in Nara prefecture, Japan, is the Isonokami Shrine. The shrine which is thought to have been built in 4 AD is home to several Japanese national treasures, including the famous sword Nanatsusaya no Tachi, or ‘Seven-Branched Sword’. If you’re able to read the inscription on the blade, you’ll learn that the Seven-Branched Sword was gifted to the King of Wa, or ruler of Japan, by king of Baekje, which is believed to be an ancient kingdom in the south of Korea. The swords design indicates that it was never meant to be used as a weapon, but rather it was intended to be used as a ceremonial piece.

The Sword in the Stone of San Galgano

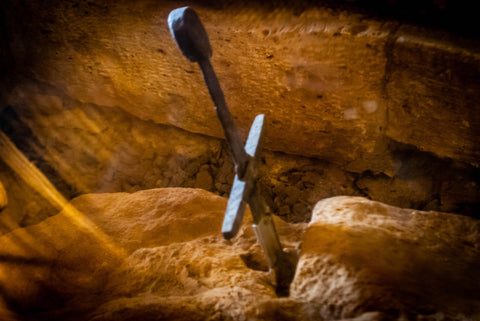
Sword in the Stone of San Galgano

If you ever find yourself in Tuscany, Italy, take the time to travel to the top of Montesiepi, where you’ll find a rather pleasant round chapel. Located in the chapel, inside a glass case you’ll see a 12th century sword lodged within a piece of solid rock. According to legend, the sword was thrust into the stone by San Galgano, a knight and local nobleman. The legend says San Galgano was out for a walk when he had a vision of Jesus, Mary and Twelve Apostles. A voice instructed San Galgano to renounce all his worldly possessions. San Galgano replied to the voice saying that giving everything up would be as easy as splitting a stone with his sword, to emphasis the point he drew his sword and thrust it into the stone. To his understandable amazement, the sword went through the stone like a hot wire through margarine, and has been stuck there ever since, allegedly.

Goujian: The Time Defying Chinese Sword

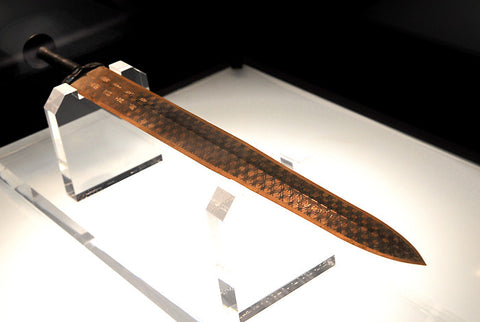
Goujian Sword
Over fifty years ago, a team of archaeologists uncovered a unusual and rare sword in a Chinese tomb. Despite the sword being over 2,000 years old, the sword seemed to have completely escaped the elements and was rust free. Additionally, the sword was able to draw blood when one of the archaeologists decided to test its sharpness on his finger, despite being a bit stupid, it seemed to prove the sword had managed to survive the ravages of time unaffected. Furthermore, the craftsmanship was incredibly detailed for a sword of this time, and was something of an oddity for the period. The sword is considered a national treasure, and was probably once owned by the Emperor Goujian of Yue.

The Cursed Muramasa Samurai Swords

Muramasa Sword
During the Muromachi period in Japan (14th – 16th Century), there lived a swordsmith named Muramasa Sengo. By all accounts he was exceptionally skilled, but also slightly unhinged, and prone to bouts of violence. The legend states that his destructive nature was passed into the swords he forged. The resulting blades would then be capable of possessing their new owners, which in turn would cause the wielder to become rage filled, unhinged warriors, just like the swordsmith who forged them.
Regardless of the dodgy reputation of the swords forged by Muramasa, they were undeniably created by a skilled swordsmith, and therefor proved to be popular in Japan. That was until Edo period, when the first Shoguns father and grandfather where both murdered by their retainers, who fate would have it, both wielded Muramasa blades. So it came to be that the Muramasa blades where thought to hold a curse against the Tokugawa family, resulting in the blades being banned by the Shogun. Just a small number of the blades survived until modern times and they are now considered priceless treasures.

Ulfberht Viking Swords

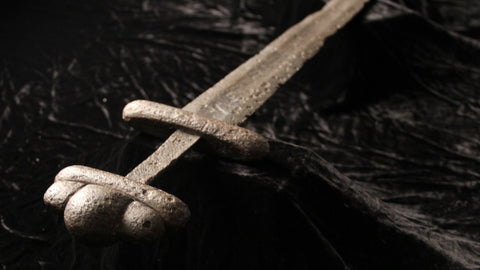
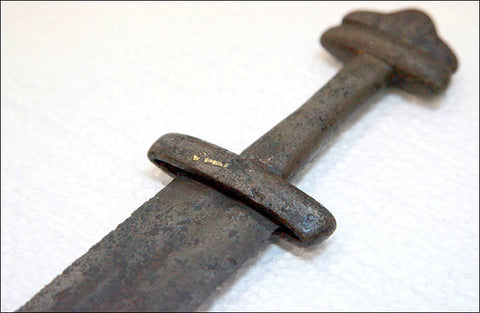
Ulfberht Viking Swords
During the last century, just over 170 Viking Ulfberht swords have been uncovered in and around Europe, dating from approximately 800 – 1000 AD. The sword were incredibly well crafted, and made of metals so pure, that many experts have stated that they were centuries ahead of their time. The Ulfberht swords where made with crucible steel, which contains carbon which was three times higher than any other steel at the time. It was believed that the technology and methods to create this sort of steel was not invented until the Industrial Revolution.
It was originally believed that the swords may have originated from Asia or the Middle East, but modern research has identified that the materials used came from central Europe. It is entirely possible, that the methods and knowledge required to forge these swords came from outwith Europe. Interestingly, the Volga trade routes linking the Vikings and the Middle East opened at the same time the first Ulfberht swords appeared, the last of which was produced around the time the trade routes closed.

Ivan the Terrible’s Sword

Ivan the Terrible’s Sword
In 1975, archaeologists in Siberia unearthed a inexplicable medieval sword which appears to have been forged in Germany and decorated in Sweden. The archaeologists where perplexed as to how a 12th century sword created in Europe came to be unearthed from the banks of the River Om in starkly remote Novosibirsk region. Lengthy research and investigations has led to the theory that sword may have once belonged to Tsar Ivan the Terrible, which was given to him as a gift, which was then used in battle ahead of the conquest of Siberia.

Chinese Votive Sword in North America

Chinese Votive Sword
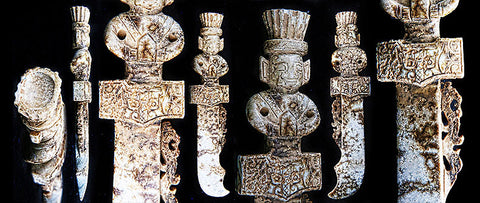
In the summer of 2014, an unusual discovery was made on the shore of a small stream in Georgia, USA. An intricately detailed Chinese votive sword which was fashioned in Lizardite. The sword was carved with several symbols, including the face mask of the Taotie and a Dragon, which are more commonly found on jade objects from the Xia and Zhou Dynasty periods (1600 – 256 BC). This sword gives weight to the theory that Chinese discovered and travelled to North America thousands of years before Christopher Columbus.

Masterfully Forged Indian Sword

Masterfully Forged Indian Sword
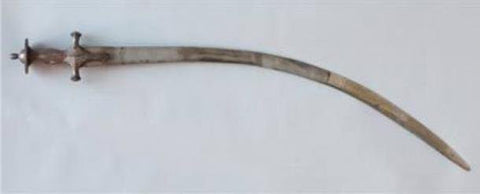
The master swordsmiths behind some of India’s incredible swords was not fully appreciated until scientists from Italy and the UK came together to study the Shamsheer swords. The original design for these swords originated from Persia, where it spread across Asia and eventually evolved into the family of swords now known as Scimitars. The scientists where able to highlight that the steel used in these swords was impressible pure. The carbon content of the swords was around one percent, making the swords stronger and able to keep an edge longer. This type of steel is commonly used in high end swords or other prestige items.

Durandal: Sword of Roland

Durandal: Sword of Roland
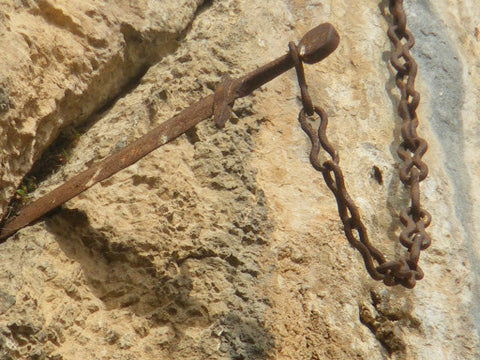
Embedded in the face of a rock in Rocamadour, which is a site roughly 160km North of Toulouse, is an iron sword surrounded in legend and myth. According to local tales, the sword, named Durandal, had been gifted to Roland, who was a famous figure, popular in medieval tales. Roland was considered to be a formidable warrior, being called the best warrior of the emperors court. One of the stories surrounding Roland is the tale of his last stand battle, the Battle of Roncevaux, which was an actual historical battle, but was later embellished to improve the story.
The legend states that Rolands sword was said have fantastical powers, so much so that during the last stand battle, Roland tried to destroy the blade before it fall into the hands of enemy. It is alleged that Roland flung Durandal high in the air, where as it descended it wedged itself in the rock in Rocamadour, where to this day it remains.


source https://www.bladespro.co.uk/blogs/news/10-legendary-swords-from-the-ancient-world